At the beginning of the instructions, the functions and mode of operation of the tablet and the control module are explained. The examples show how to connect and program basic sensors (button, photosensor), LED light and DC motor. Some of the processed examples refer to more complex models, such as a "hair dryer" or a vehicle with all connections (beeper, LED light, IR sensor, switch, DC motors). By combining the programs shown, you can control simple and complex models.
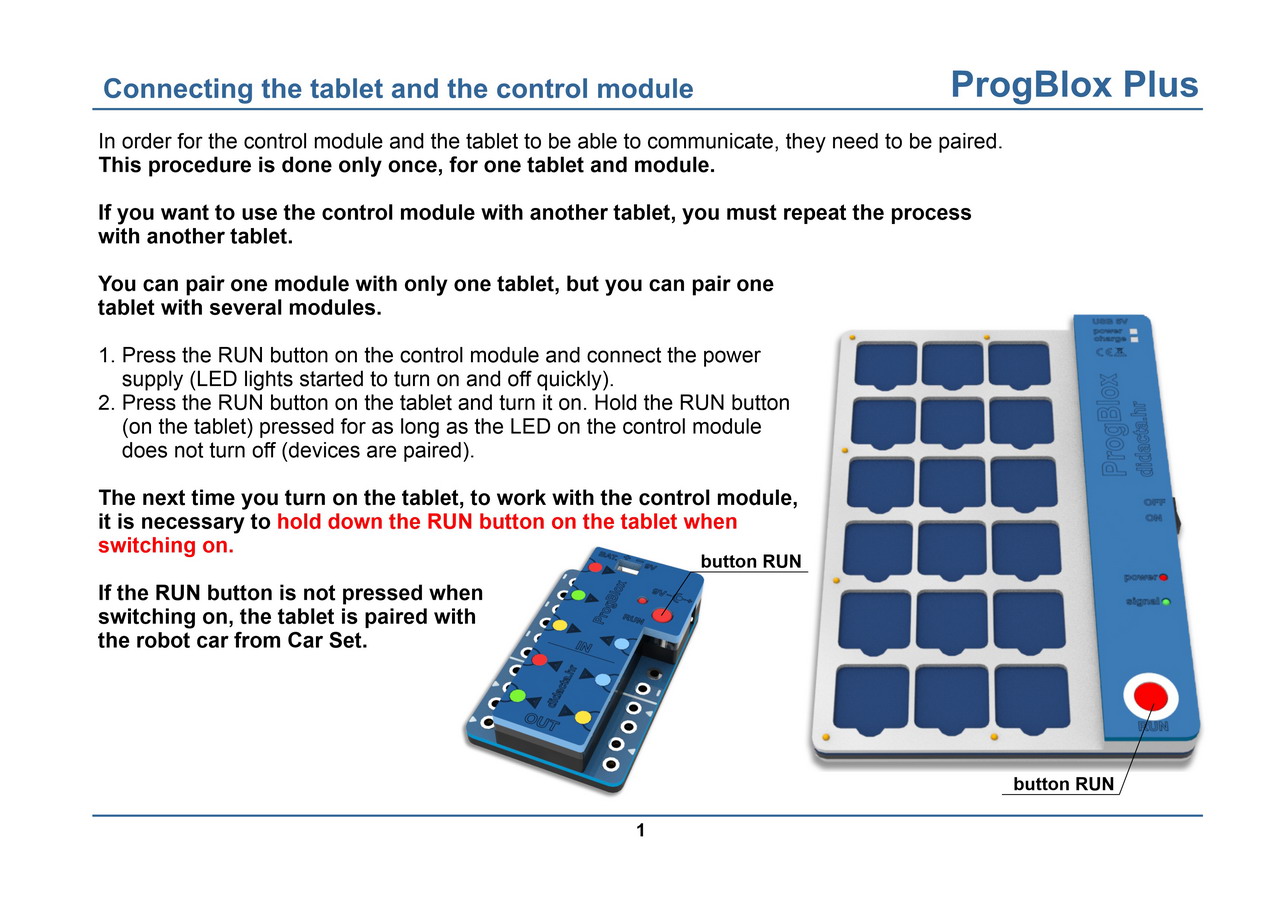
Connecting the tablet and the control module (pairing)
One or more control modules can be connected to one tablet. One module cannot be connected to multiple tablets. So you can make several models that work together, each model controlled by a separate module. The connection method is shown in the video example and described in the instructions.
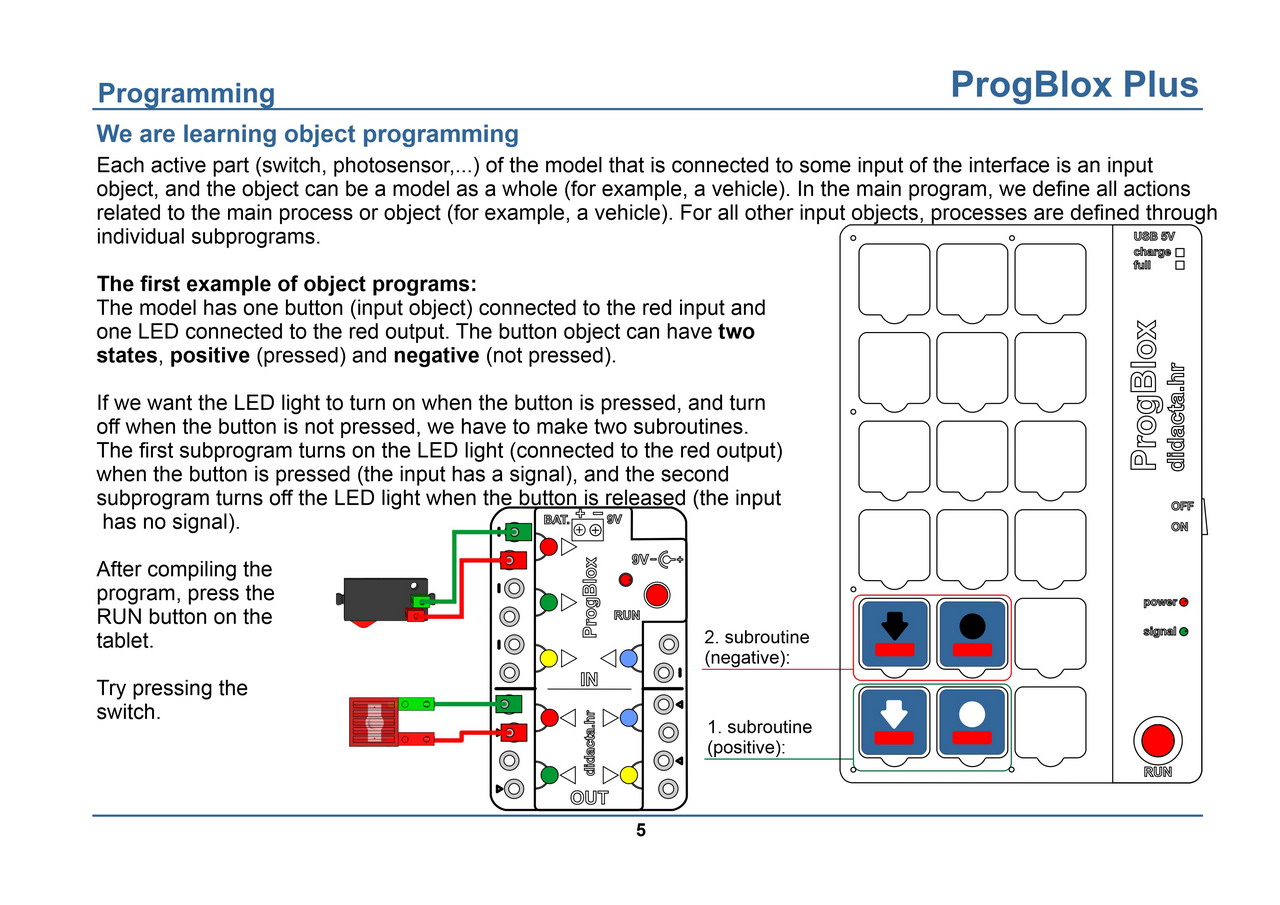
We learn object programming (introduction)
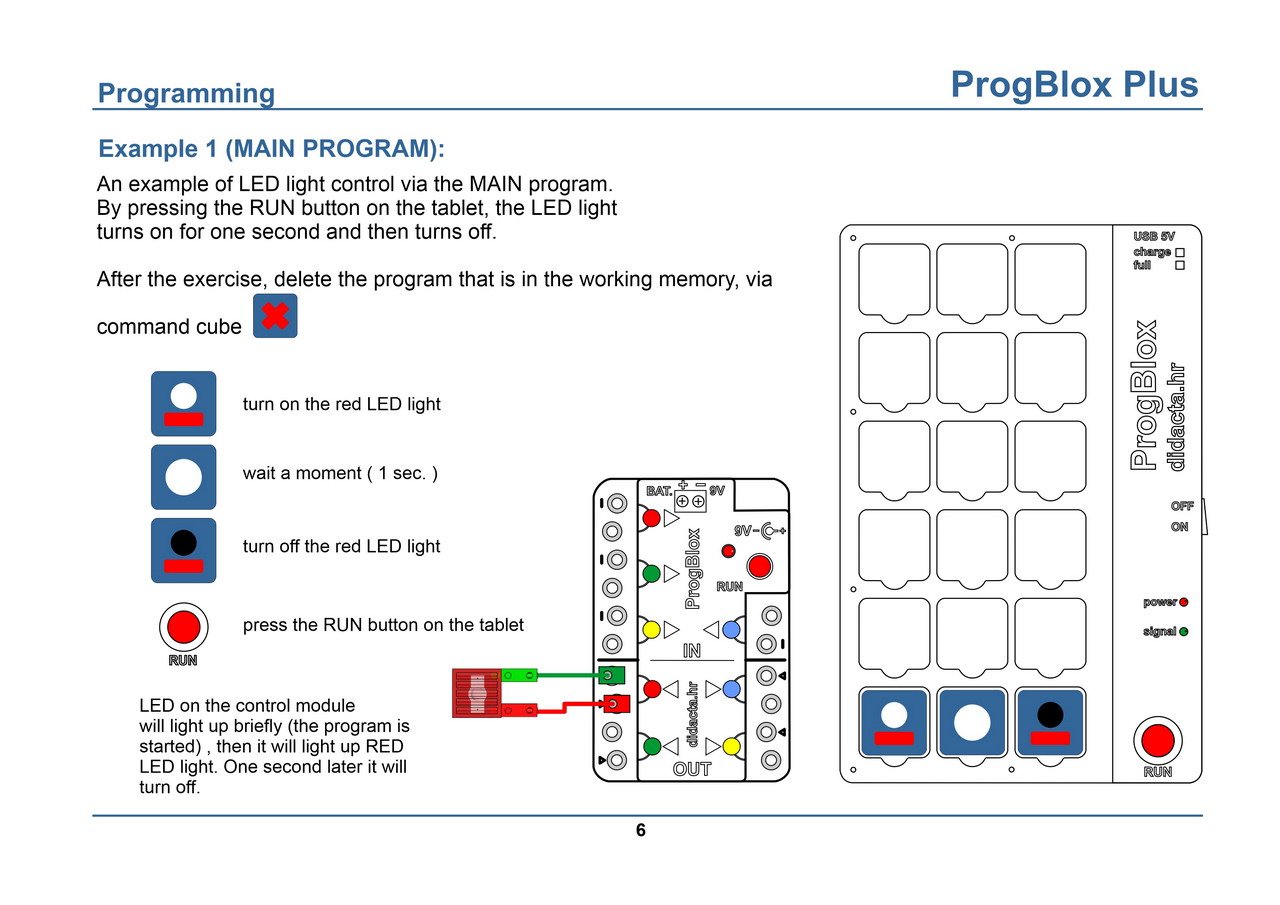
Example 1 - LED light
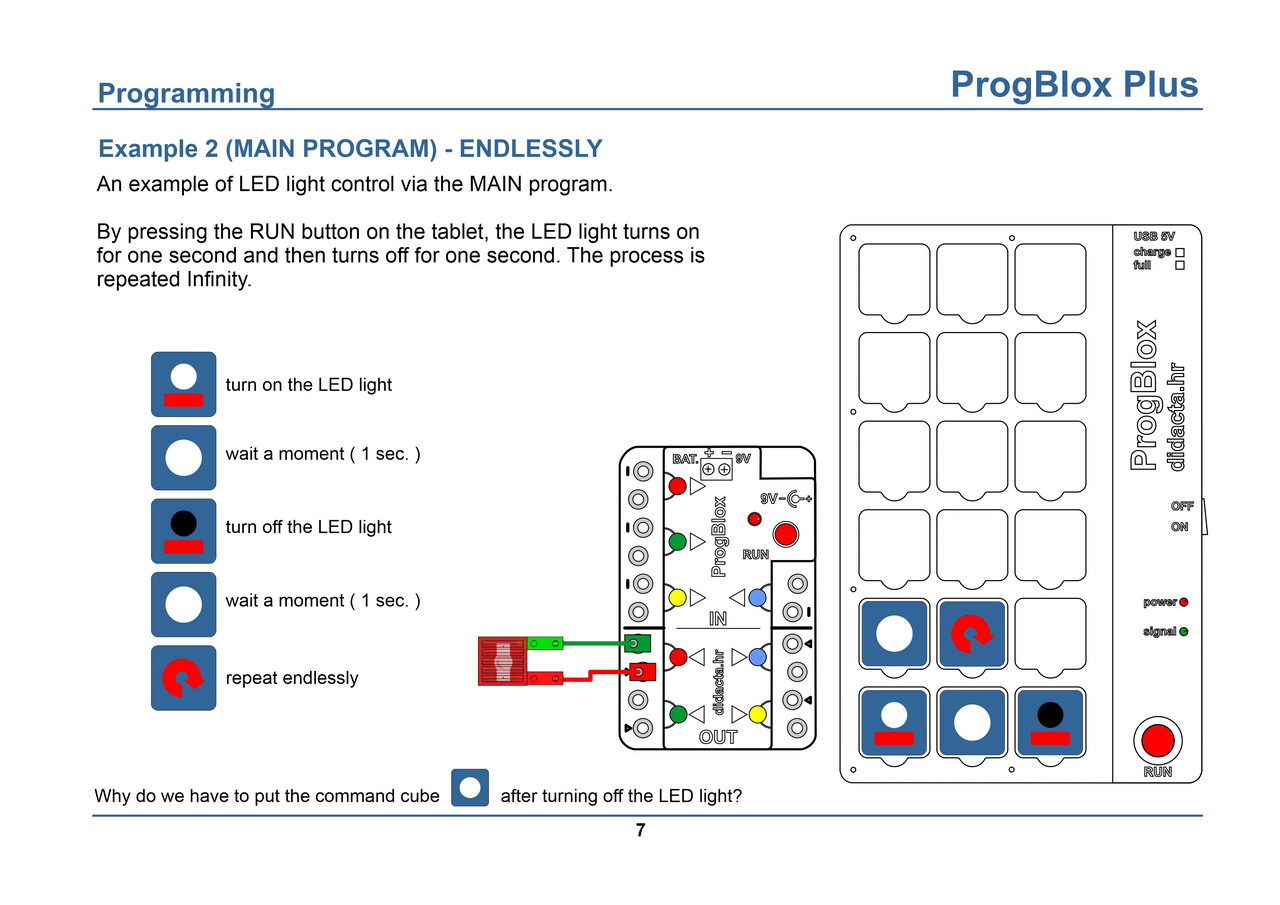
Example 2 - LED light endlessly
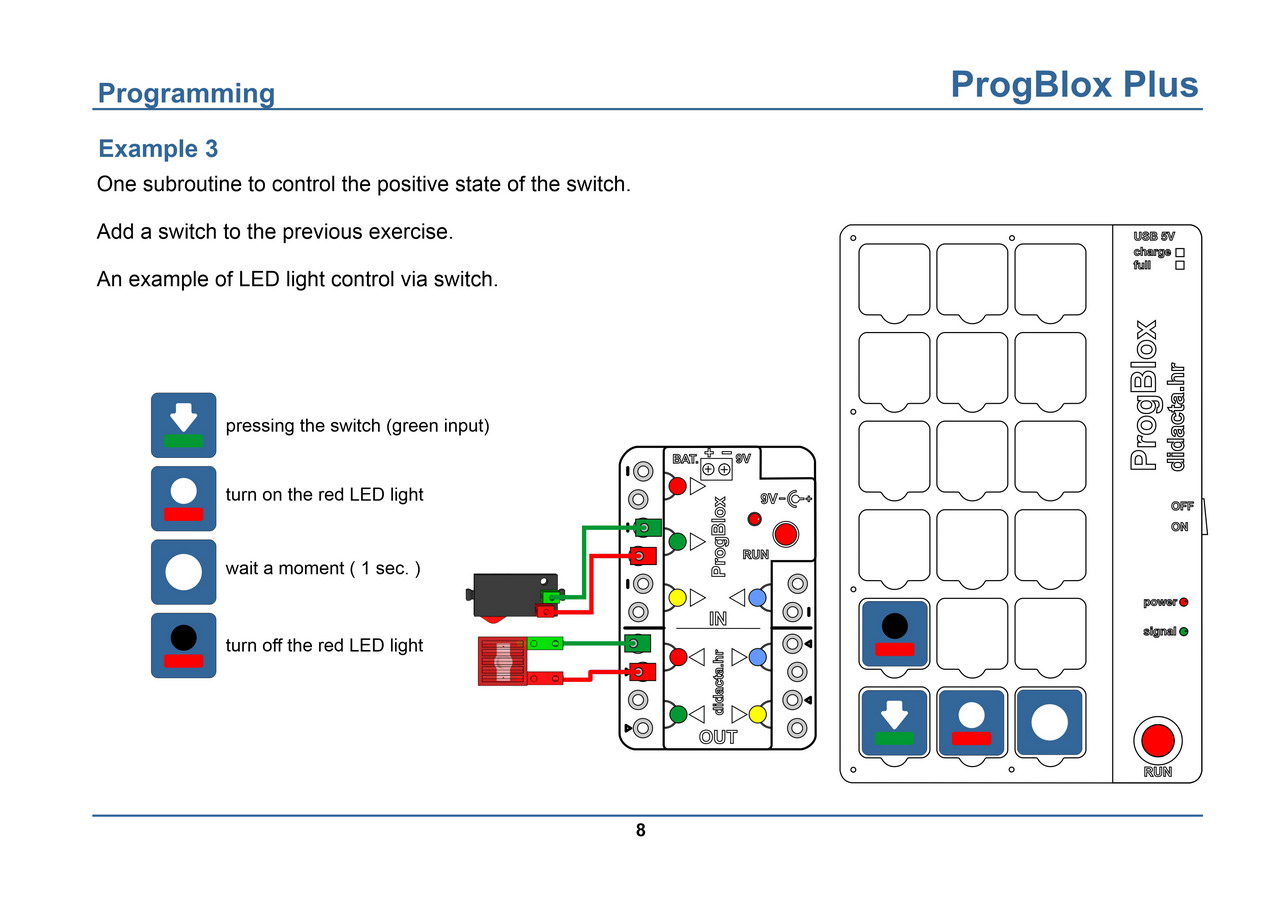
Example 3 - button and LED light
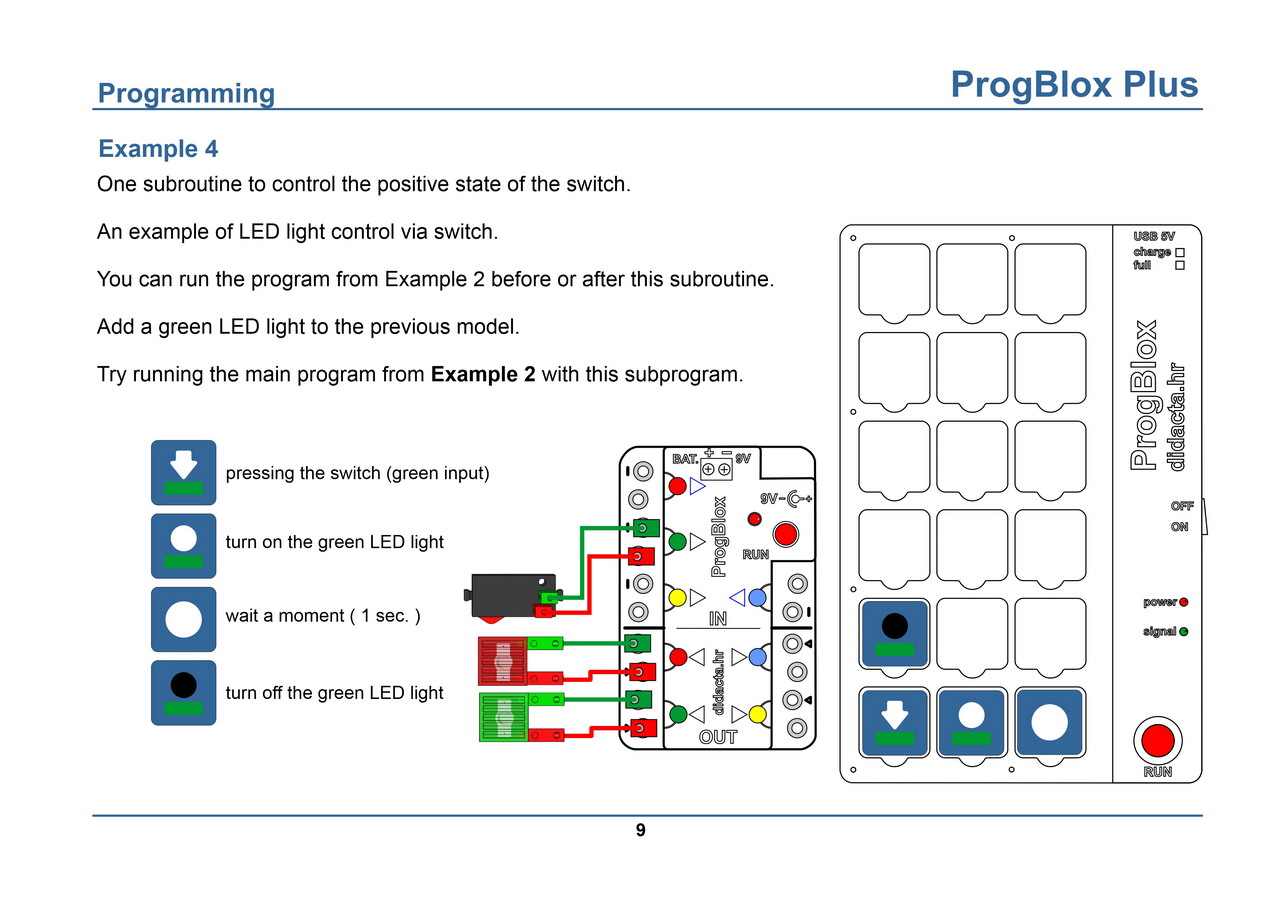
Example 4 - button and LED light + Example 2
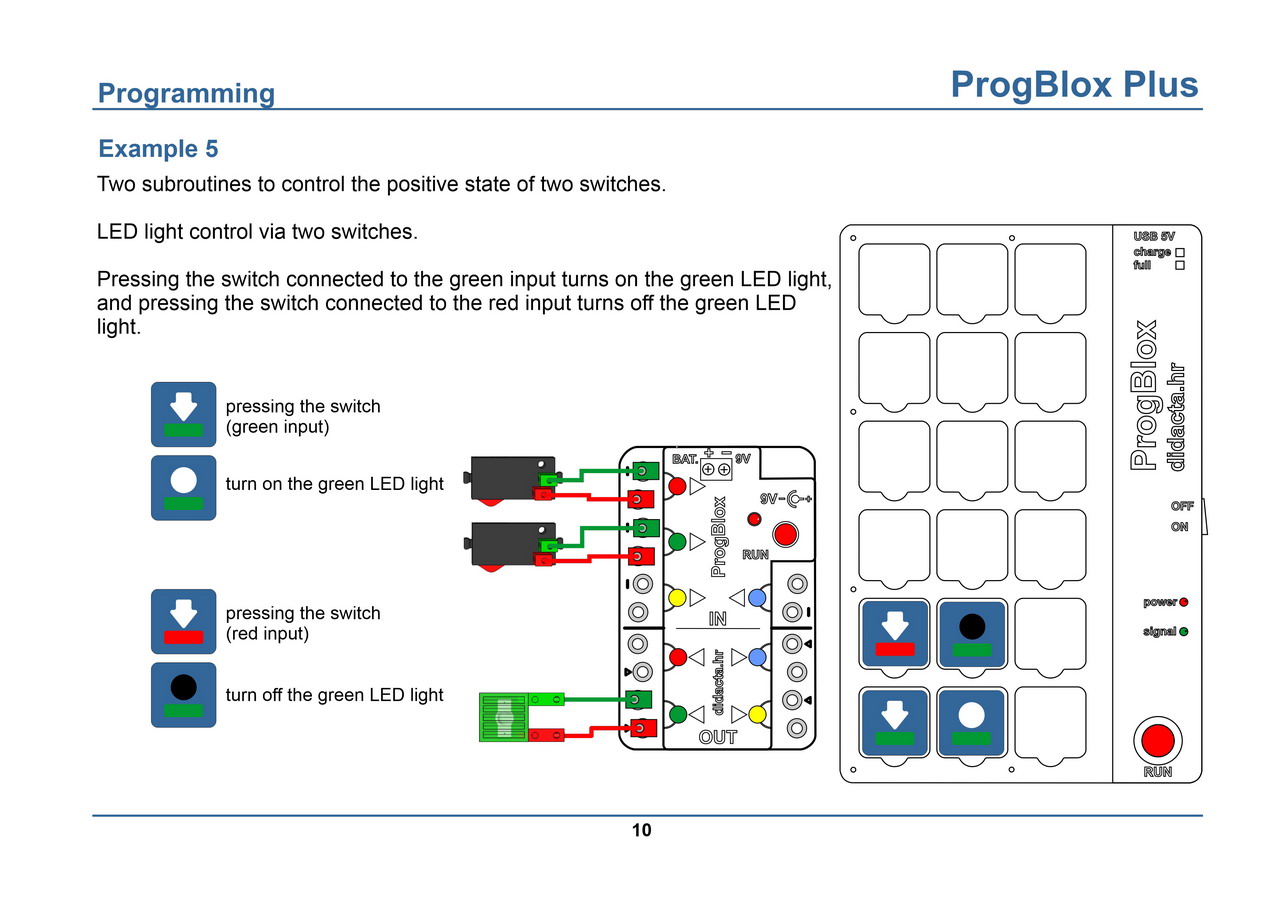
Example 5 - two buttons and an LED light
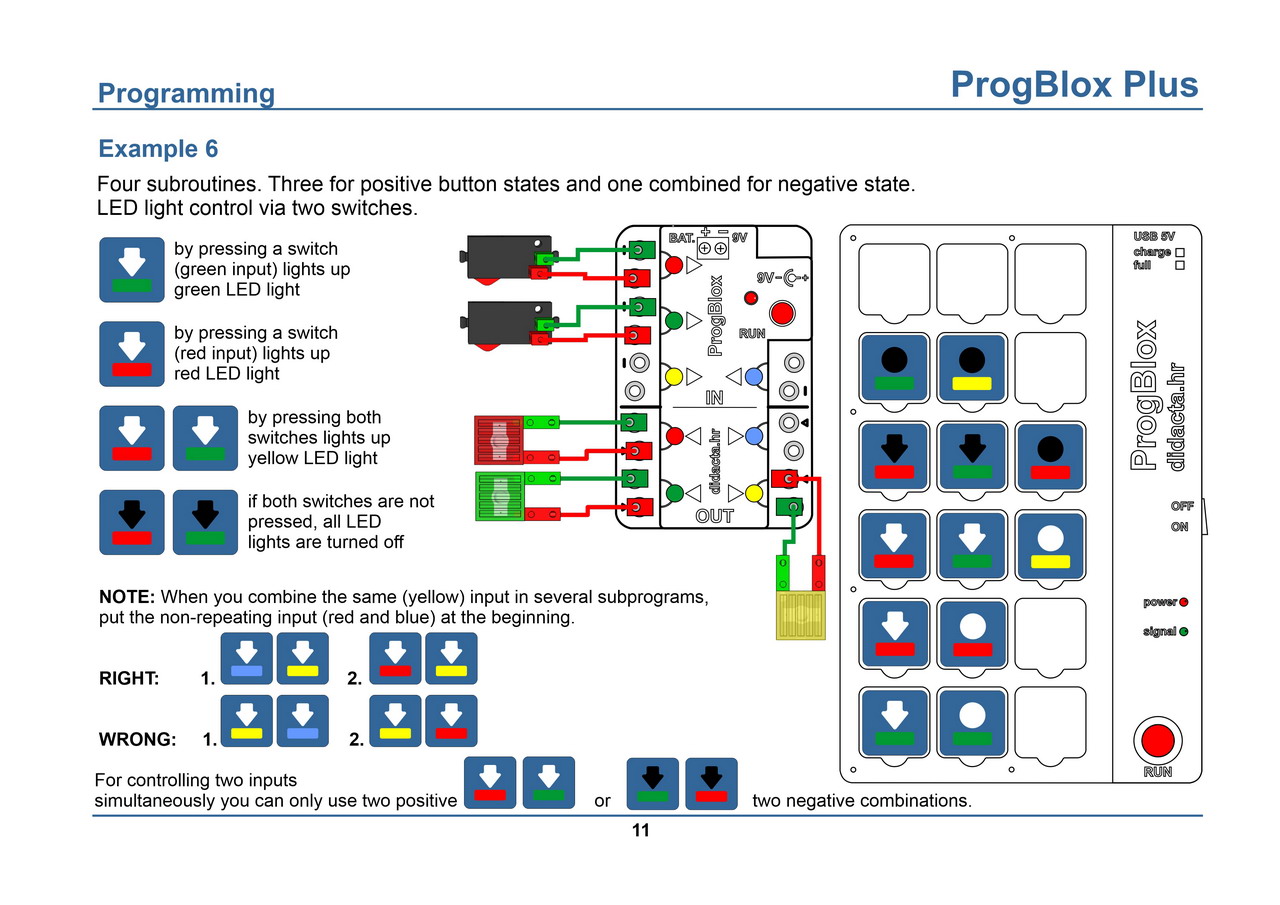
Example 6 - two buttons and two LED lights
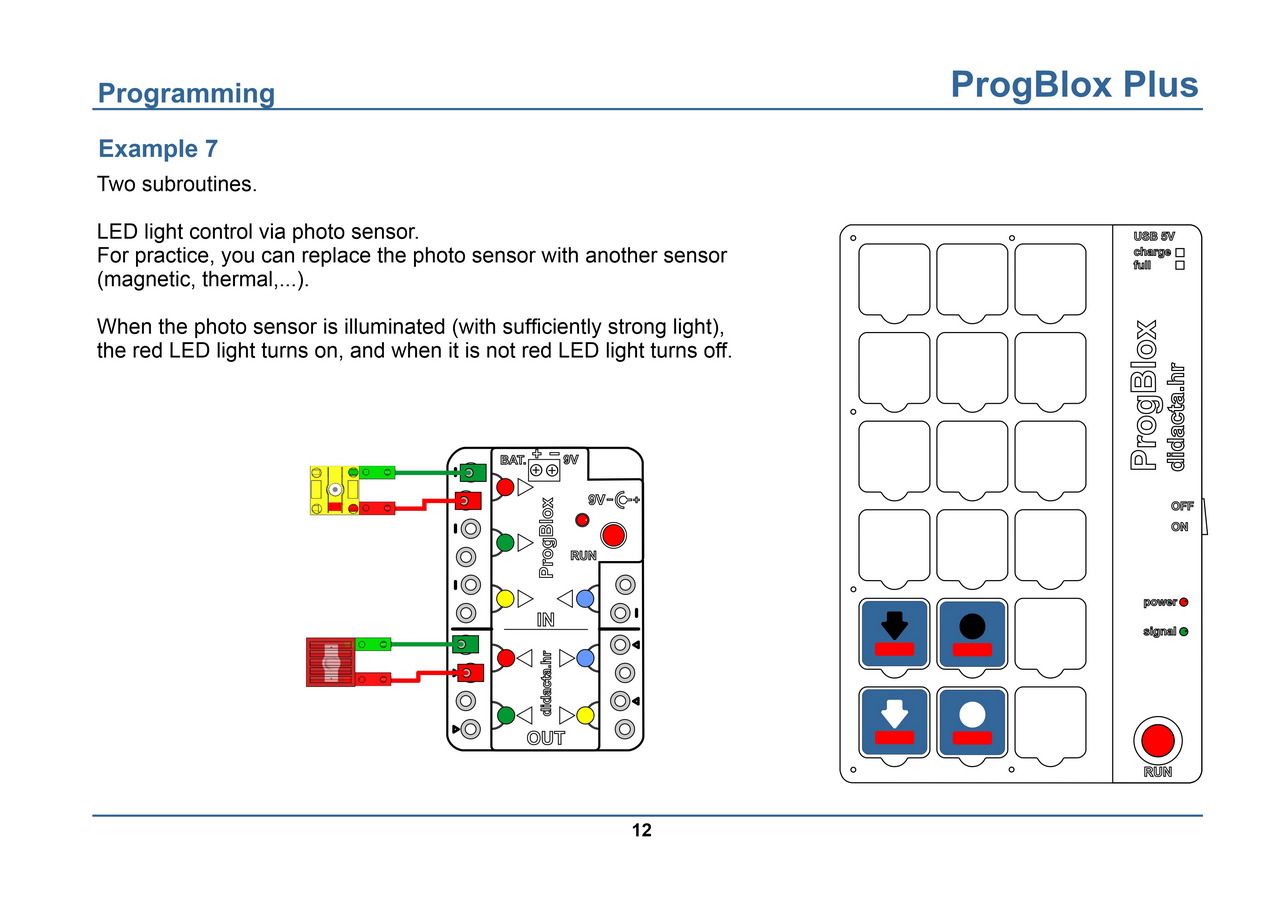
Example 7 - photo sensor and LED light
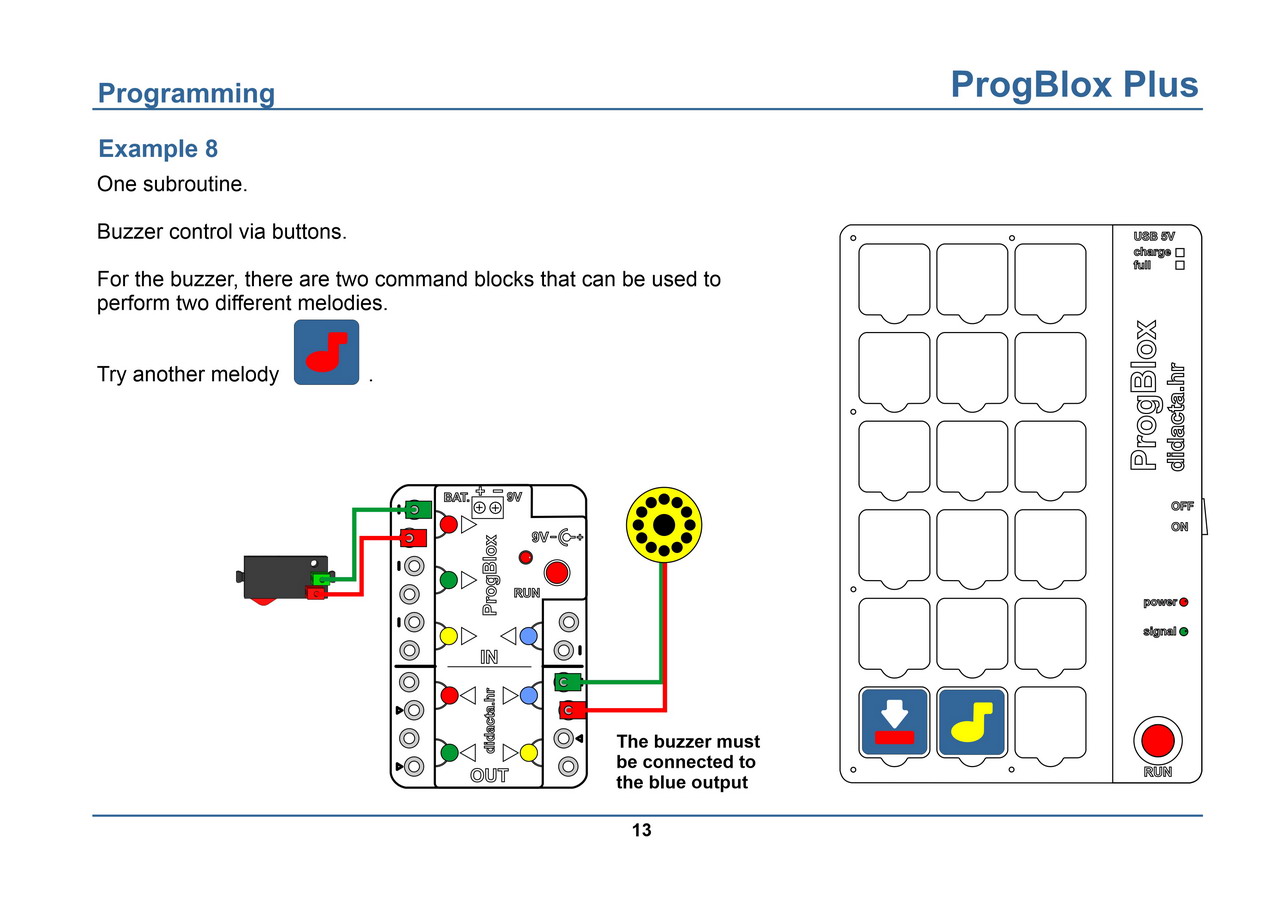
Example 8 - button and buzzer
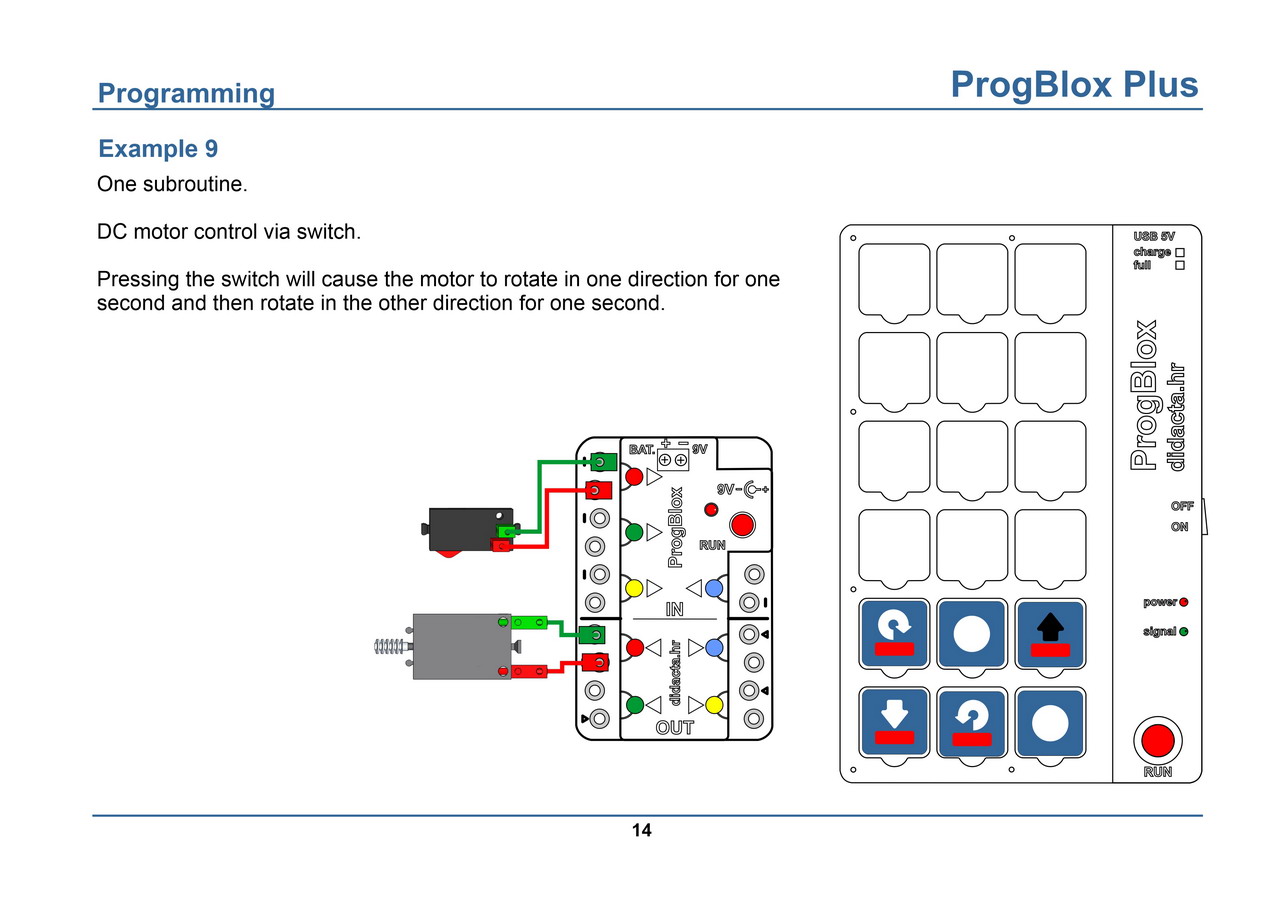
Example 9 - DC motor control via buttons
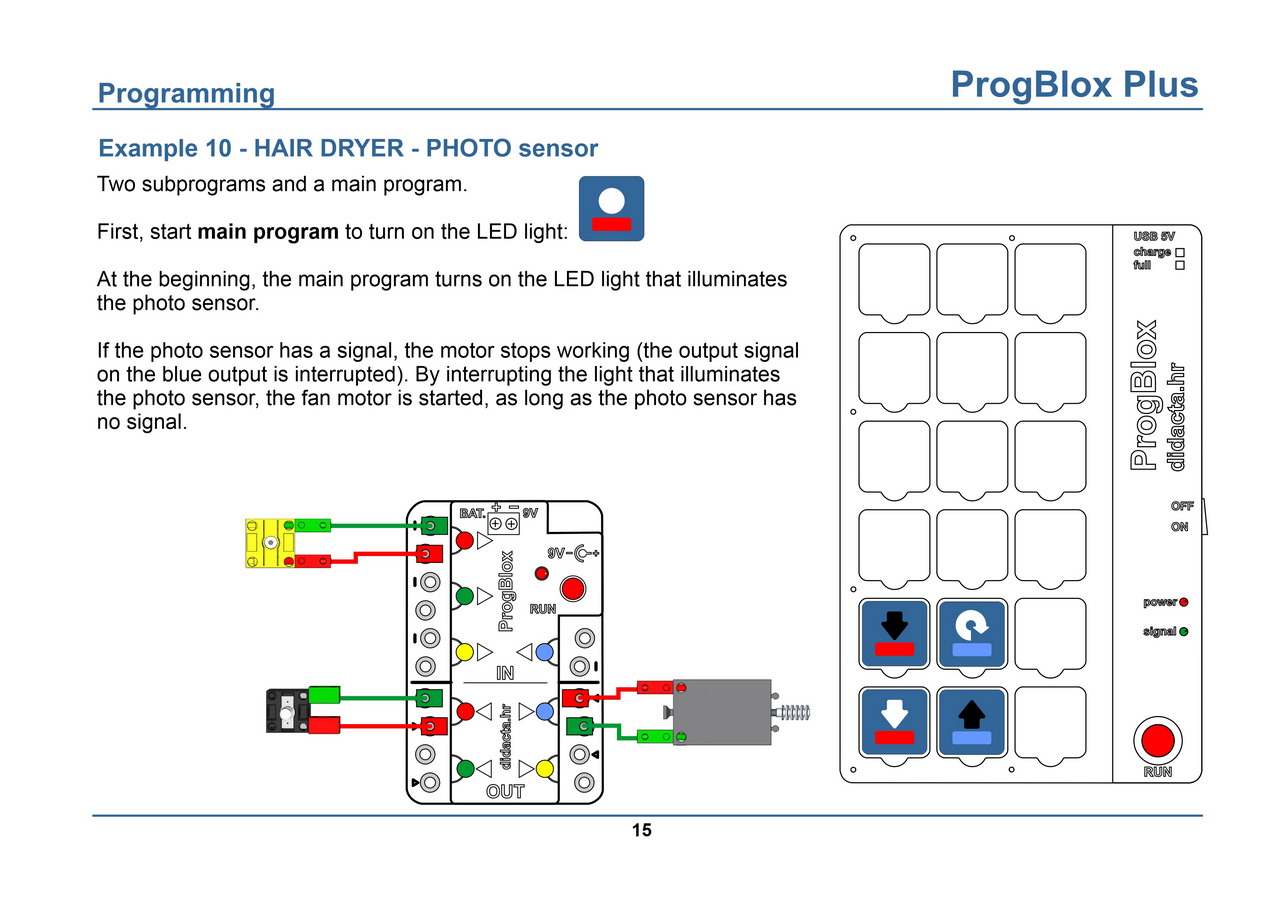
Example 10 - hair dryer
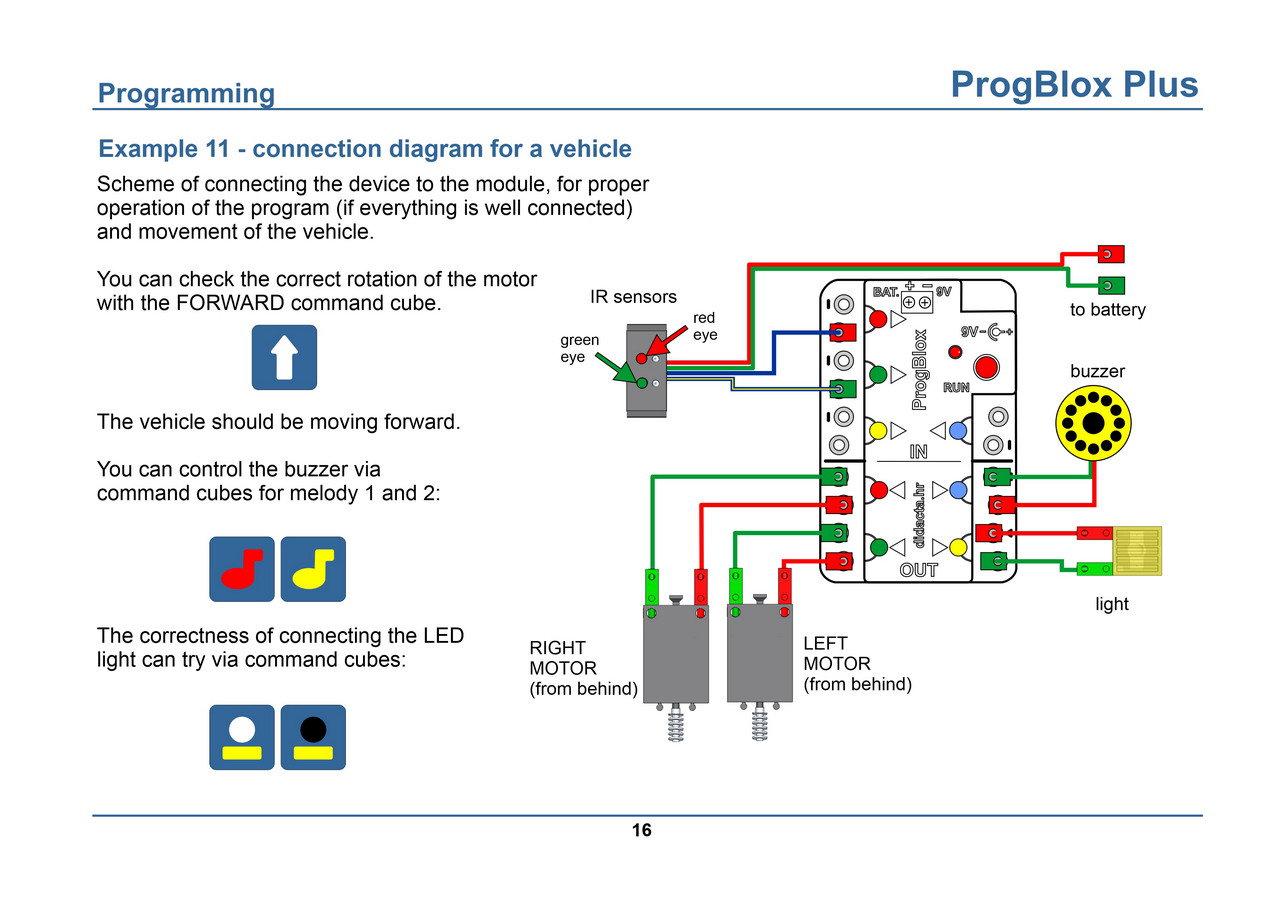
Example 11 - connection diagram for a vehicle
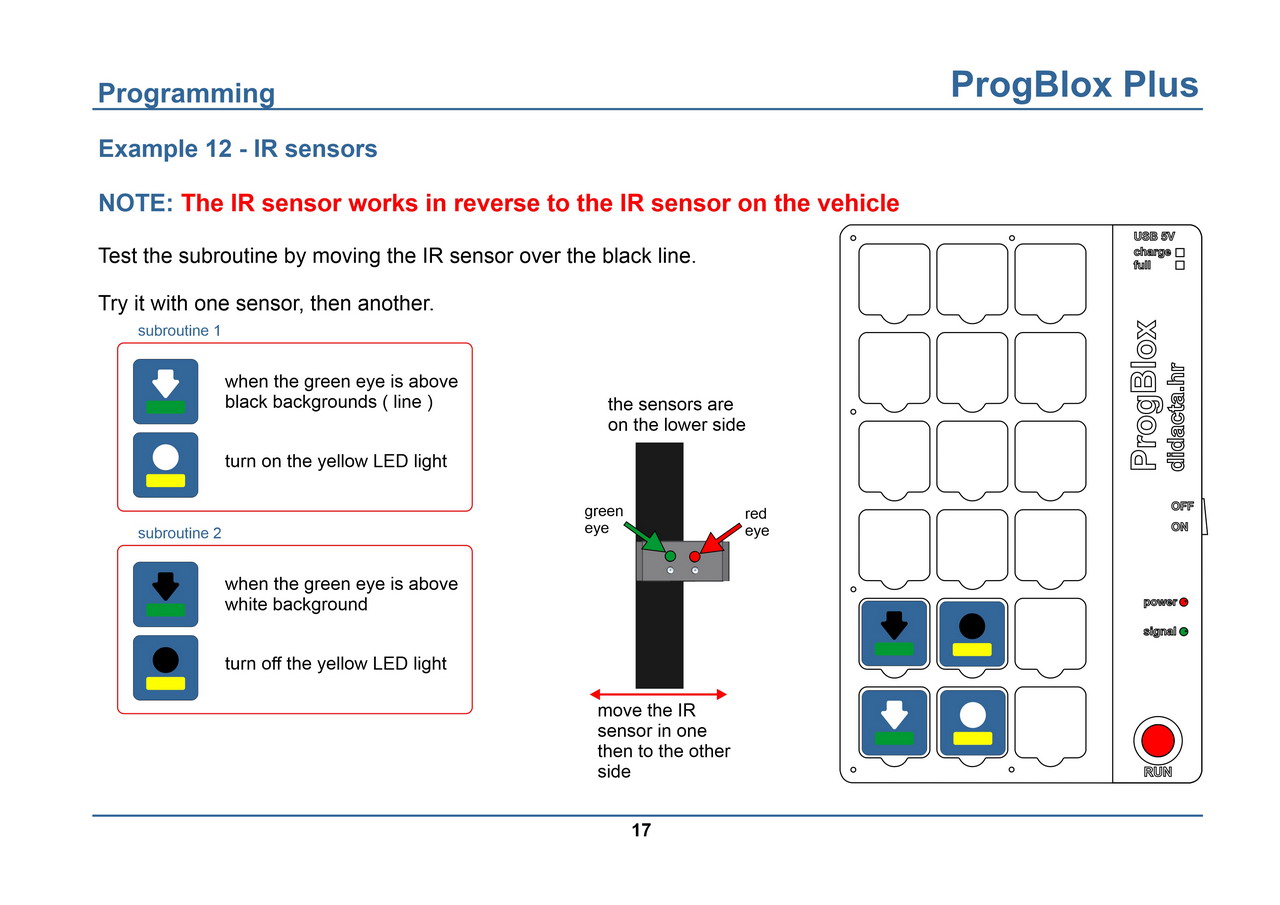
Example 12 - IR sensors
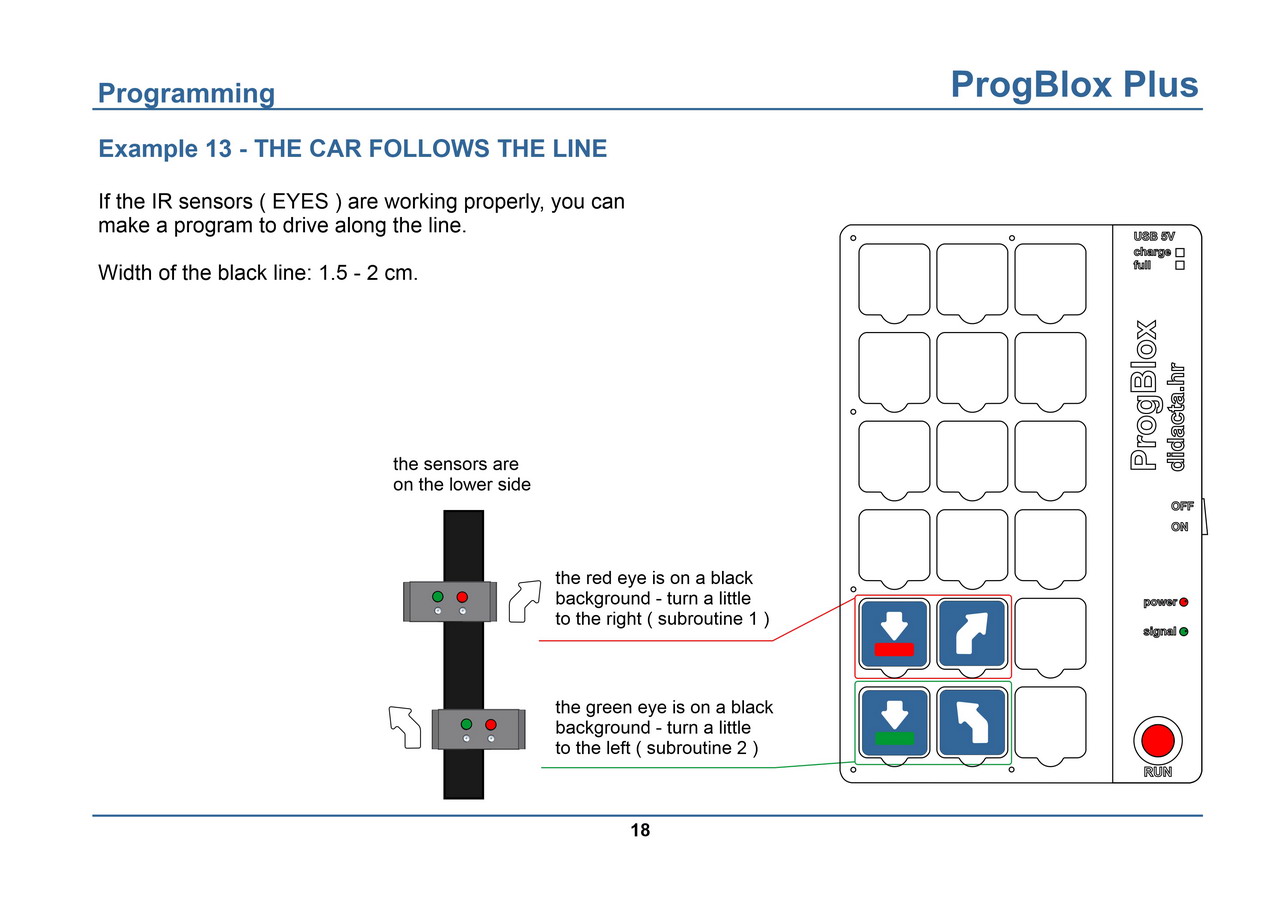
Example 13 - the vehicle follows the line
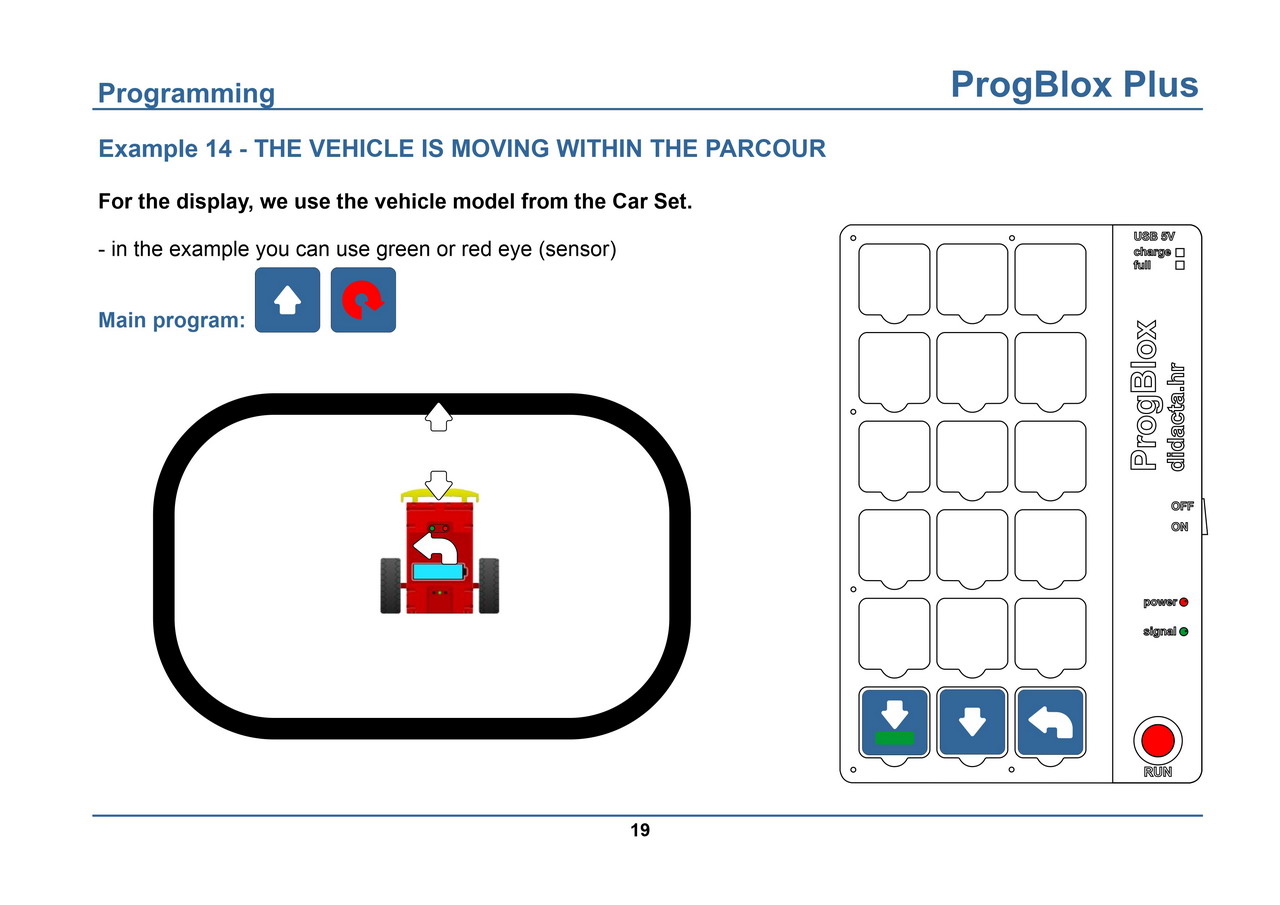
Example 14 - vehicle inside the parcour (IR sensor)
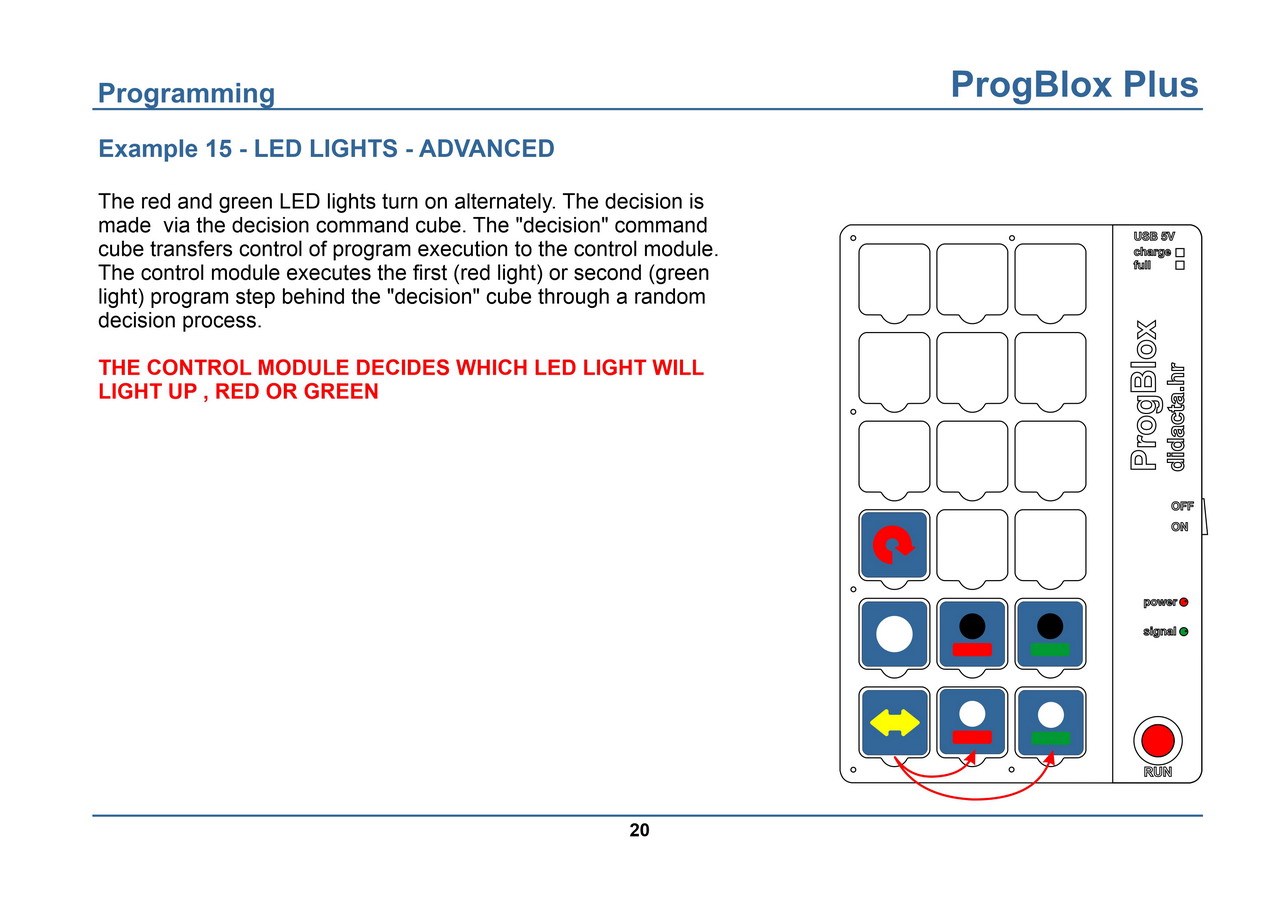
Example 15 - LED lights - ADVANCED
Example 16 - vehicle inside parcour (IR sensor) - ADVANCED
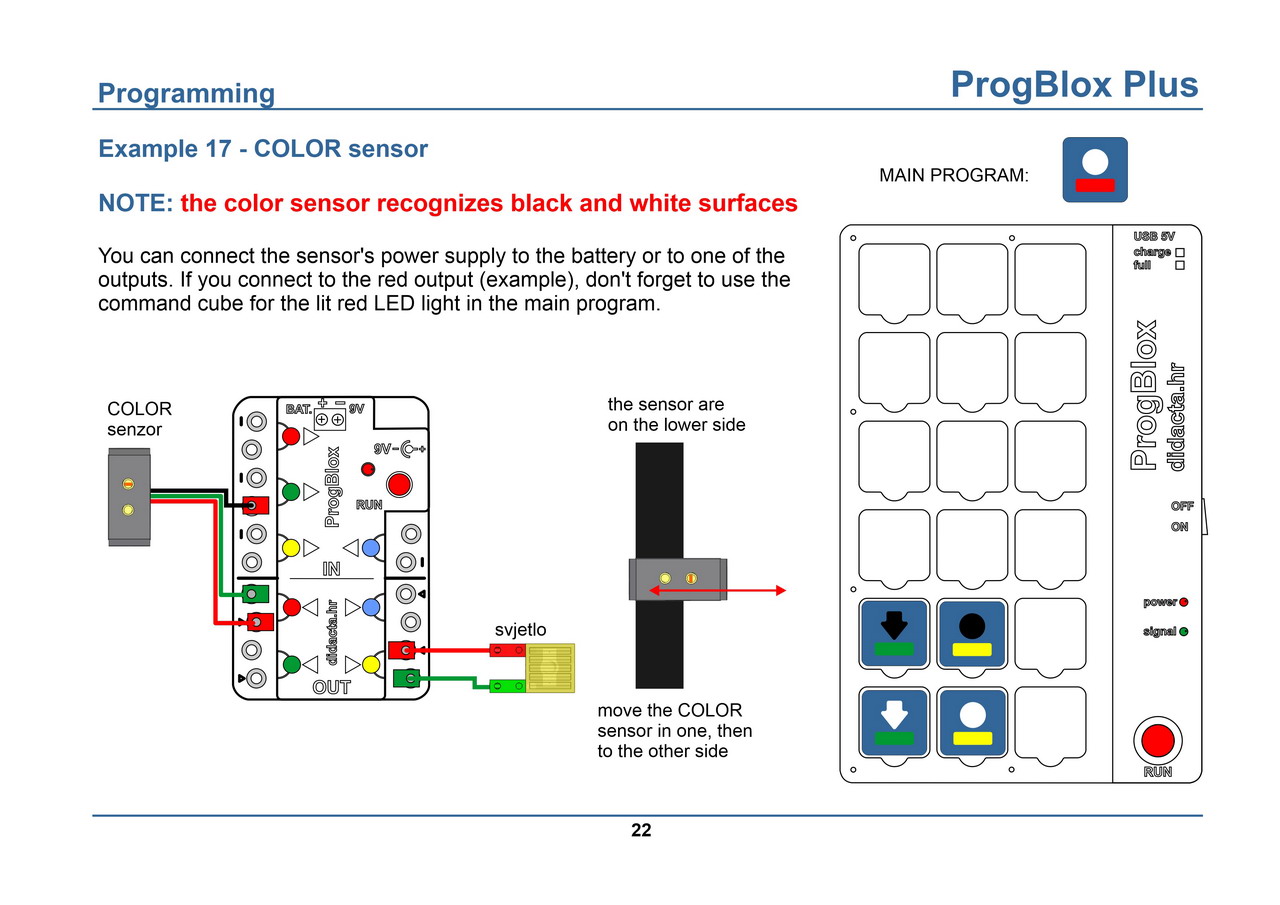
Example 17 - COLOR sensor
The color sensor can be connected to any input of the control module. You can use several sensors simultaneously. You can connect the sensor's power supply to the battery, or to one of the outputs if you have free ones (video example). Do not forget to turn on the power supply of the sensors that are connected to the output.
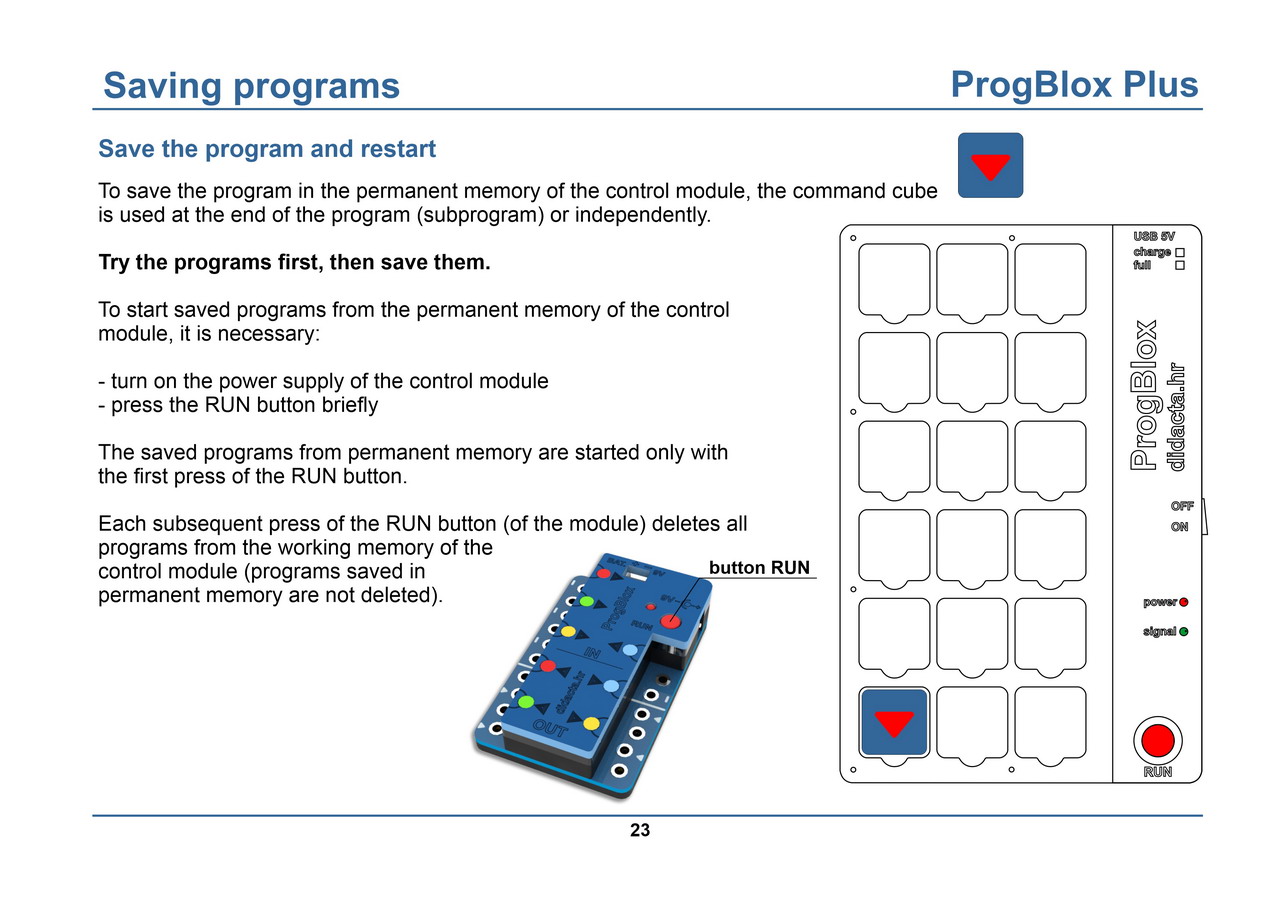
Save the program and restart
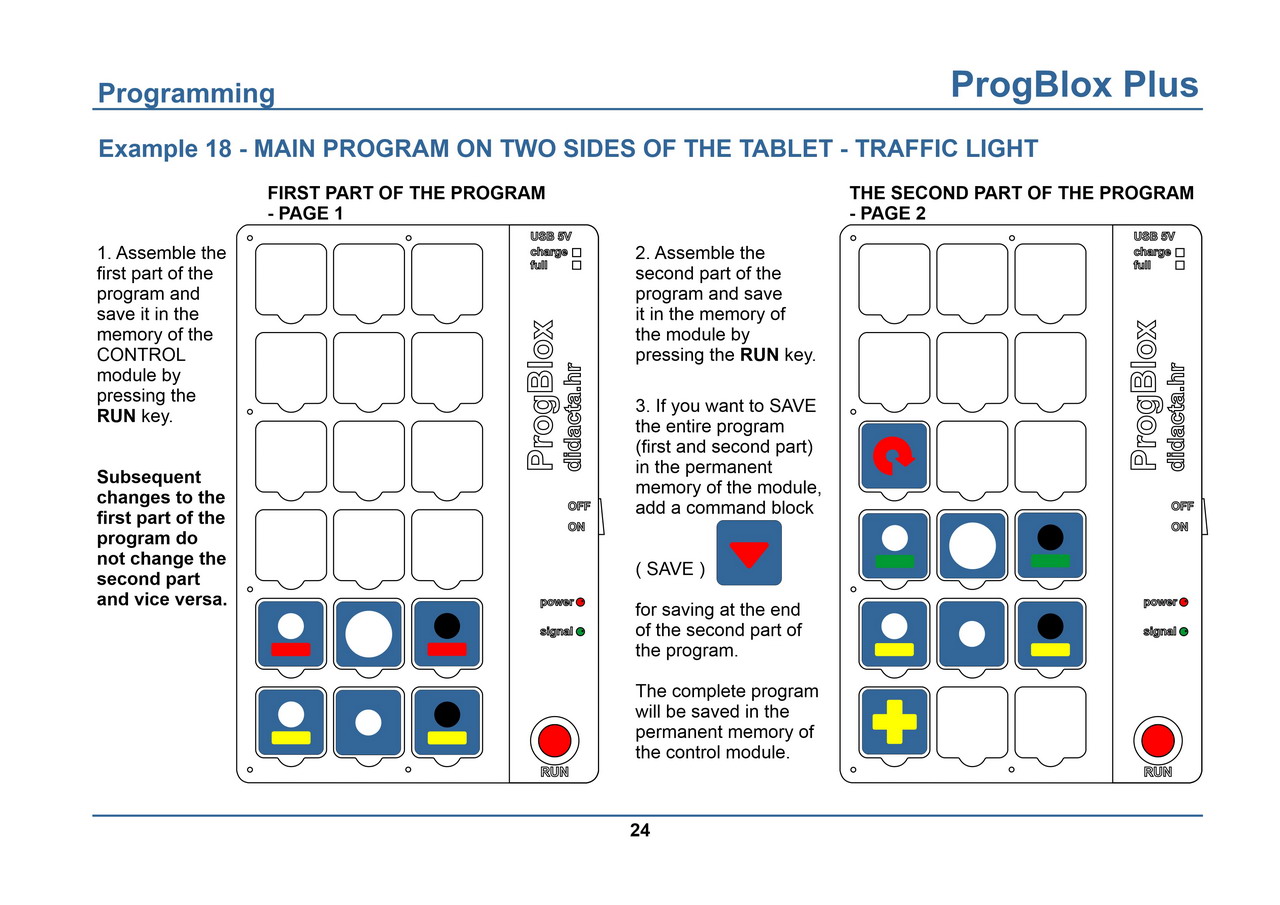
Example 18 - The main program on two sides of the tablet
Why? If you want to assemble the main program that does not fit on one page of the tablet (18 blocks) or you are missing some cubes that appear twice in the program.