At the beginning of the instructions, the functions and mode of operation of the tablet and the robotic vehicle are explained. Basic programming functions are explained with examples for LED lights. The first eleven program examples show the way to assemble the program and all the controls related to the sensors located on the robotic vehicle. Examples from twelve to twenty-one demonstrate the possibilities of vehicle control through sensors.
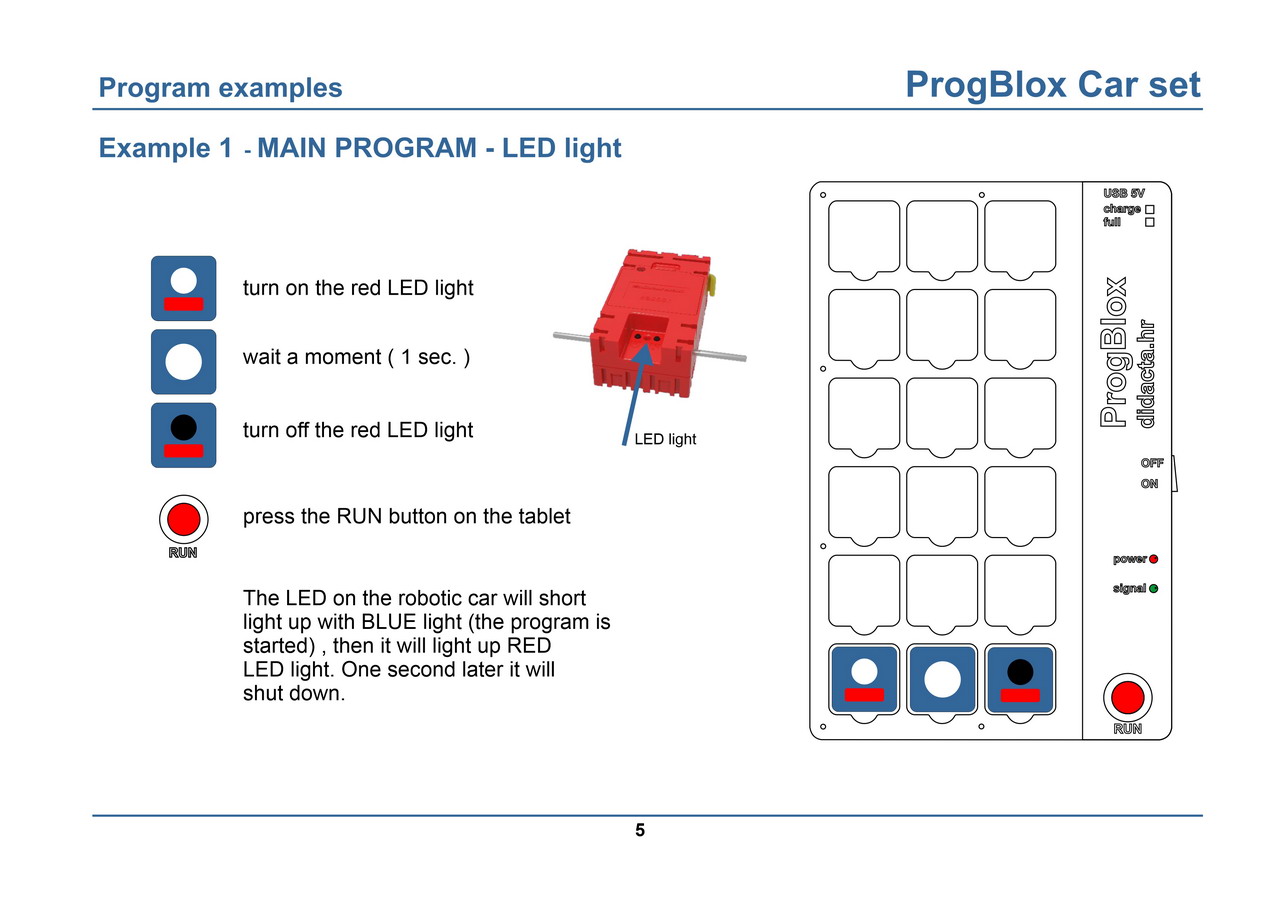
Example 01 - swithch ON red LED light
Display of the complete procedure from turning on the tablet and the robotic car. Then the program that we start with the RUN button is assembled. After the exercise is finished, the program should be deleted so that it does not get mixed up with the new program.
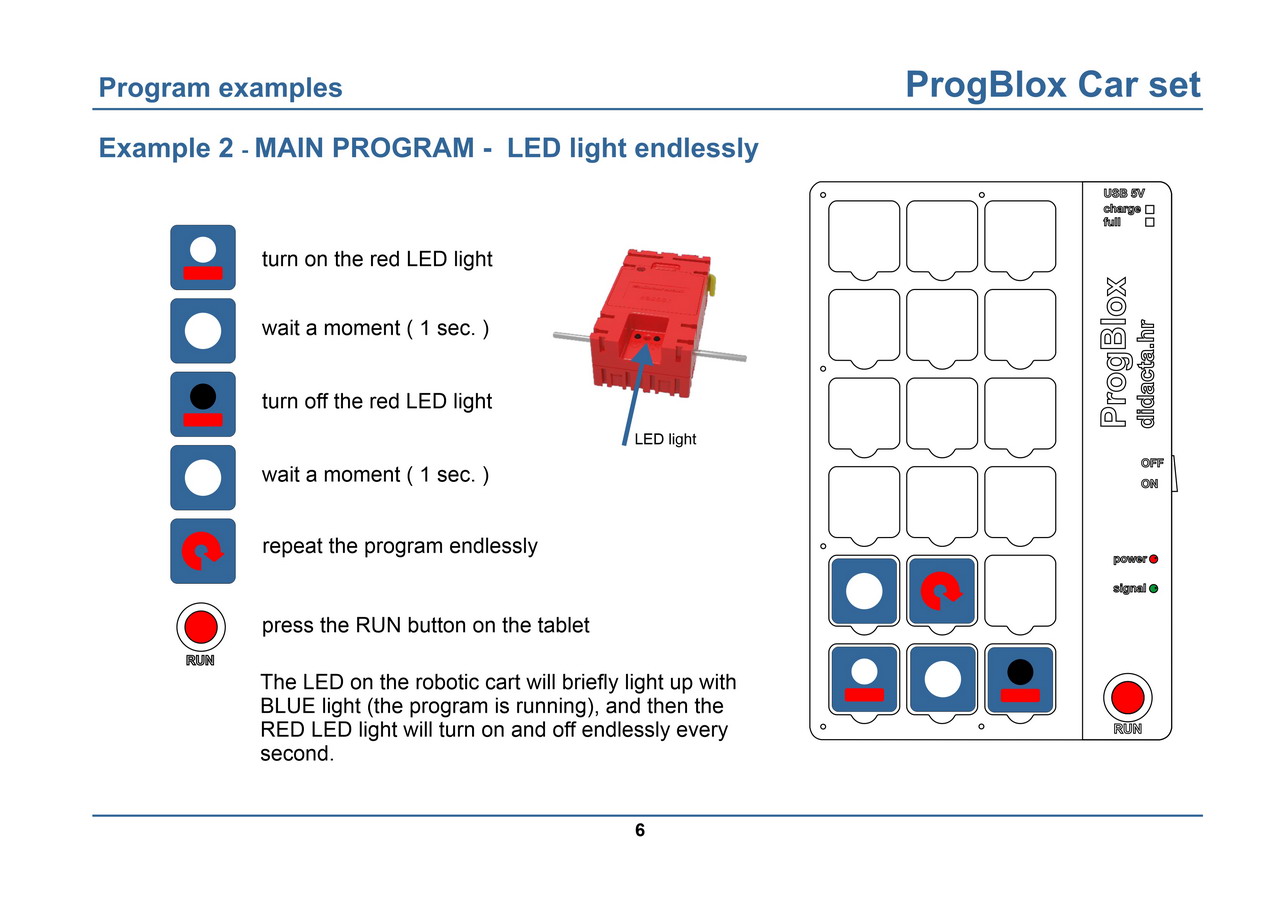
Example 02 - turns red LED light on and off endlessly
An example of an infinite loop - the main program. The red LED light turns on and off endlessly.
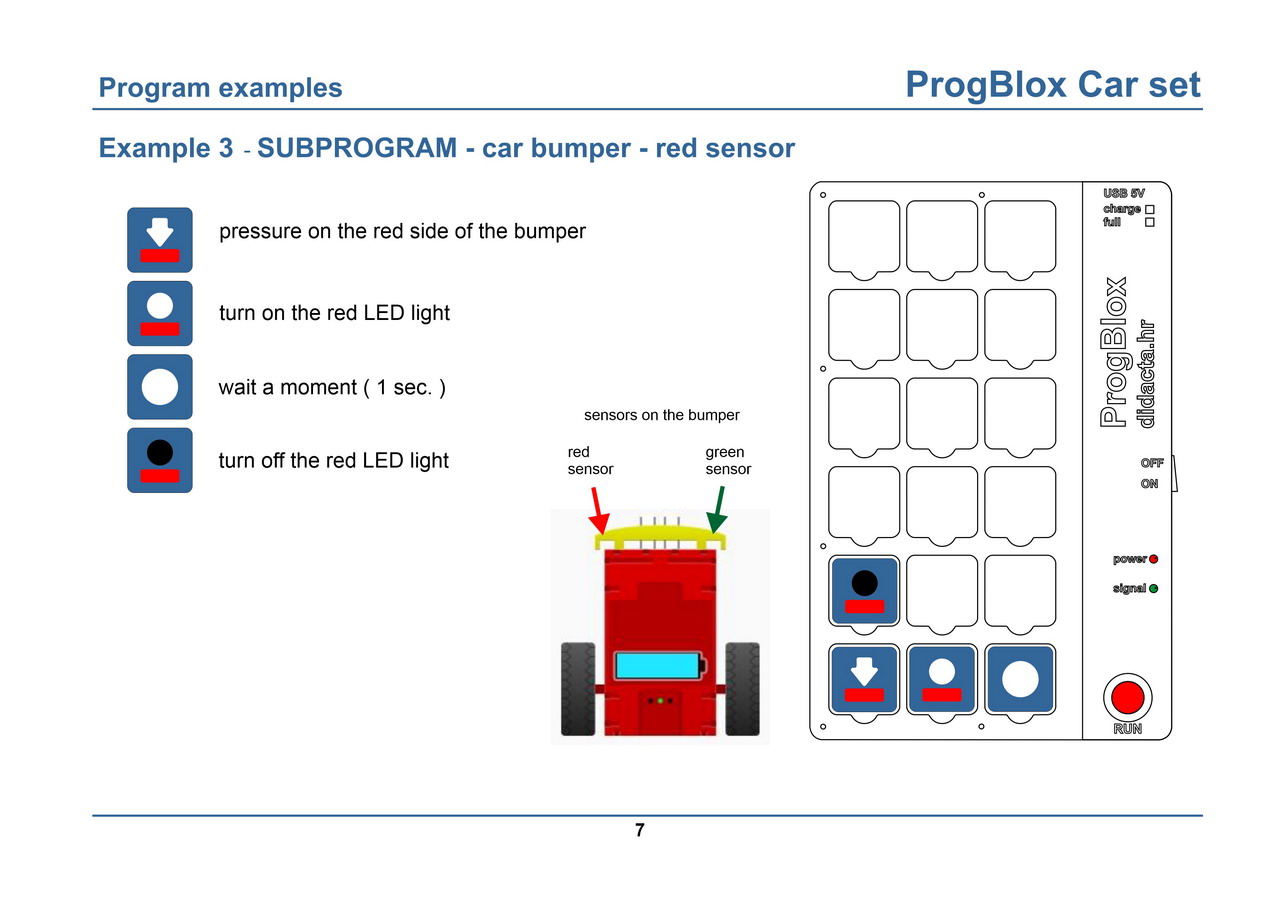
Example 03 - bumper sensors - red
Sensor control on the bumper. We marked the sensors on the bumper as RED and GREEN. The example shows turning on the red LED light by pressing the RED side of the bumper.
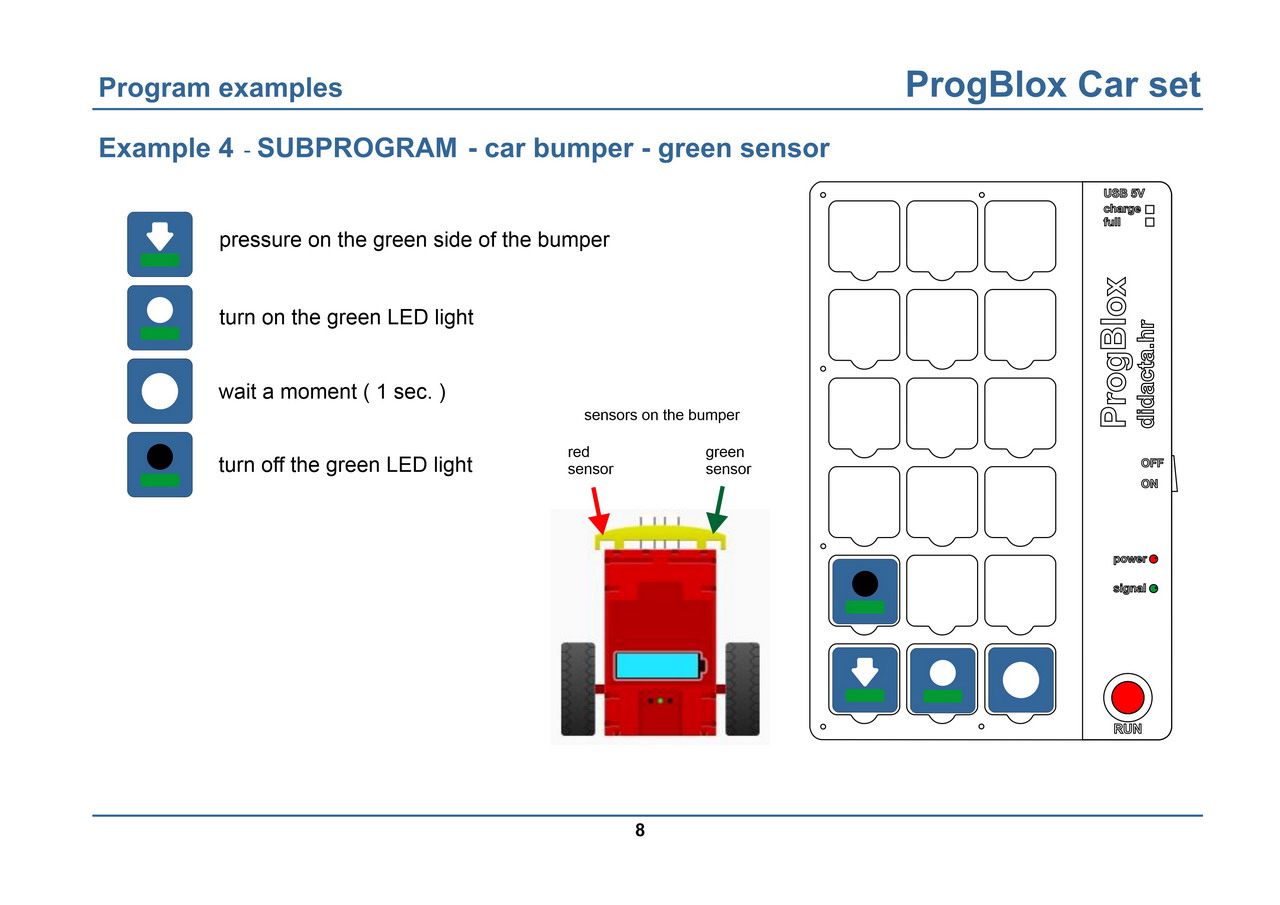
Example 04 - bumper sensors - green
Sensor control on the bumper. We marked the sensors on the bumper as RED and GREEN. The example shows turning on the green LED by pressing the GREEN side of the bumper.
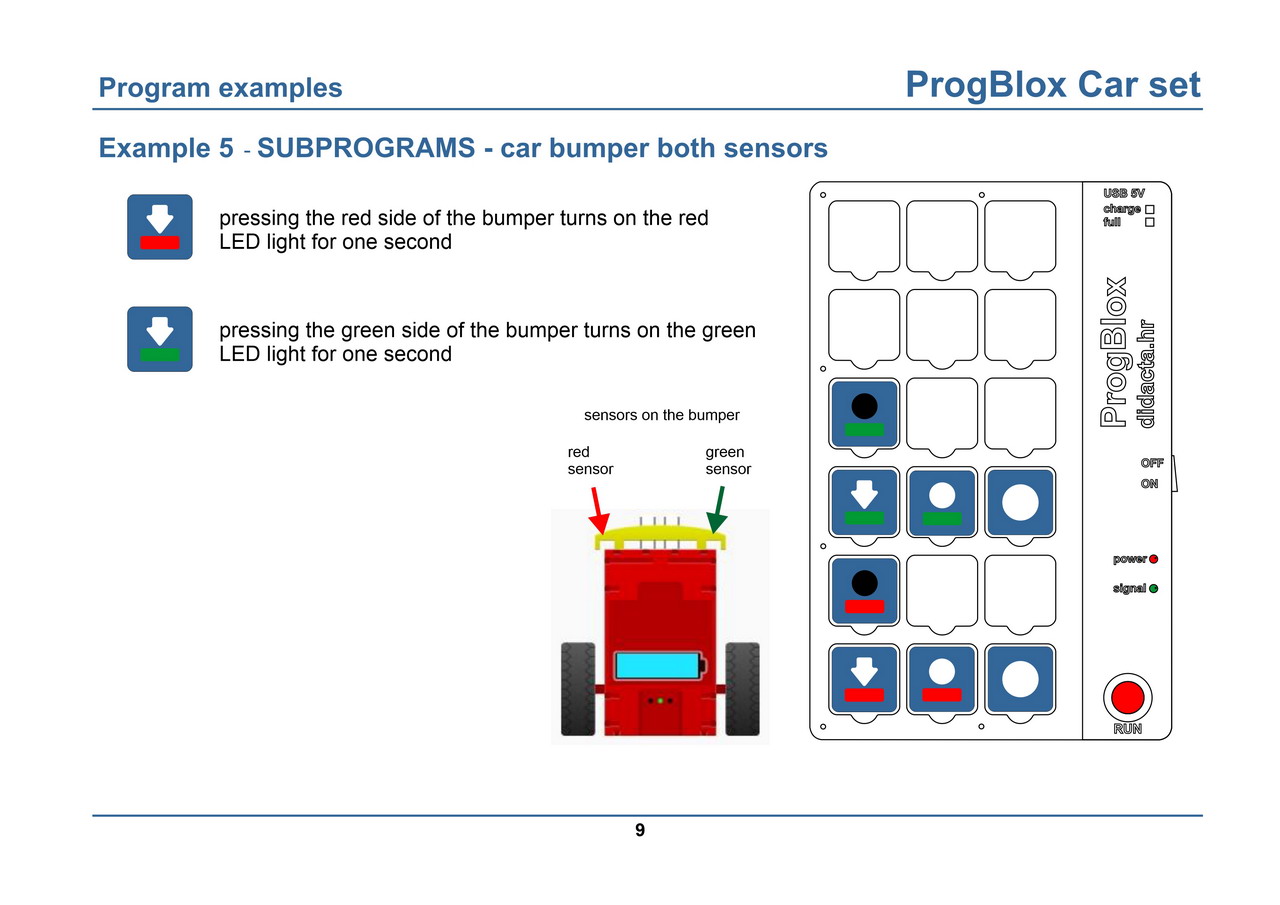
Example 05 - bumper sensors - green and red
Sensor control on the bumper. We marked the sensors on the bumper as RED and GREEN. The example shows turning on the green LED light by pressing the GREEN side of the bumper and the red LED light by pressing the RED side of the bumper.
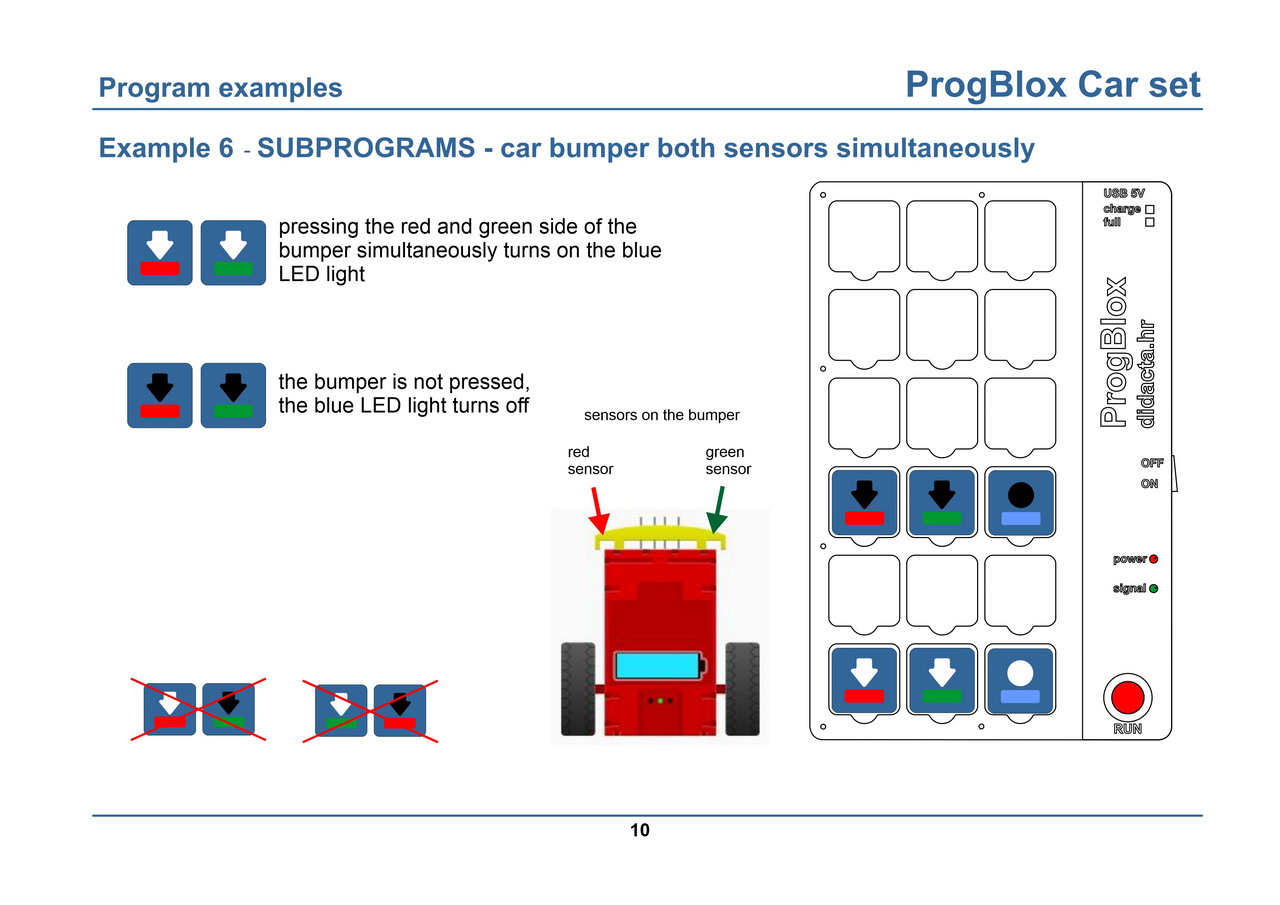
Example 06 - bumper sensors - both sensors simultaneously
Sensor control on the bumper. We marked the sensors on the bumper as RED and GREEN. The example shows turning on the blue LED light by pressing the GREEN and RED side of the bumper simultaneously.
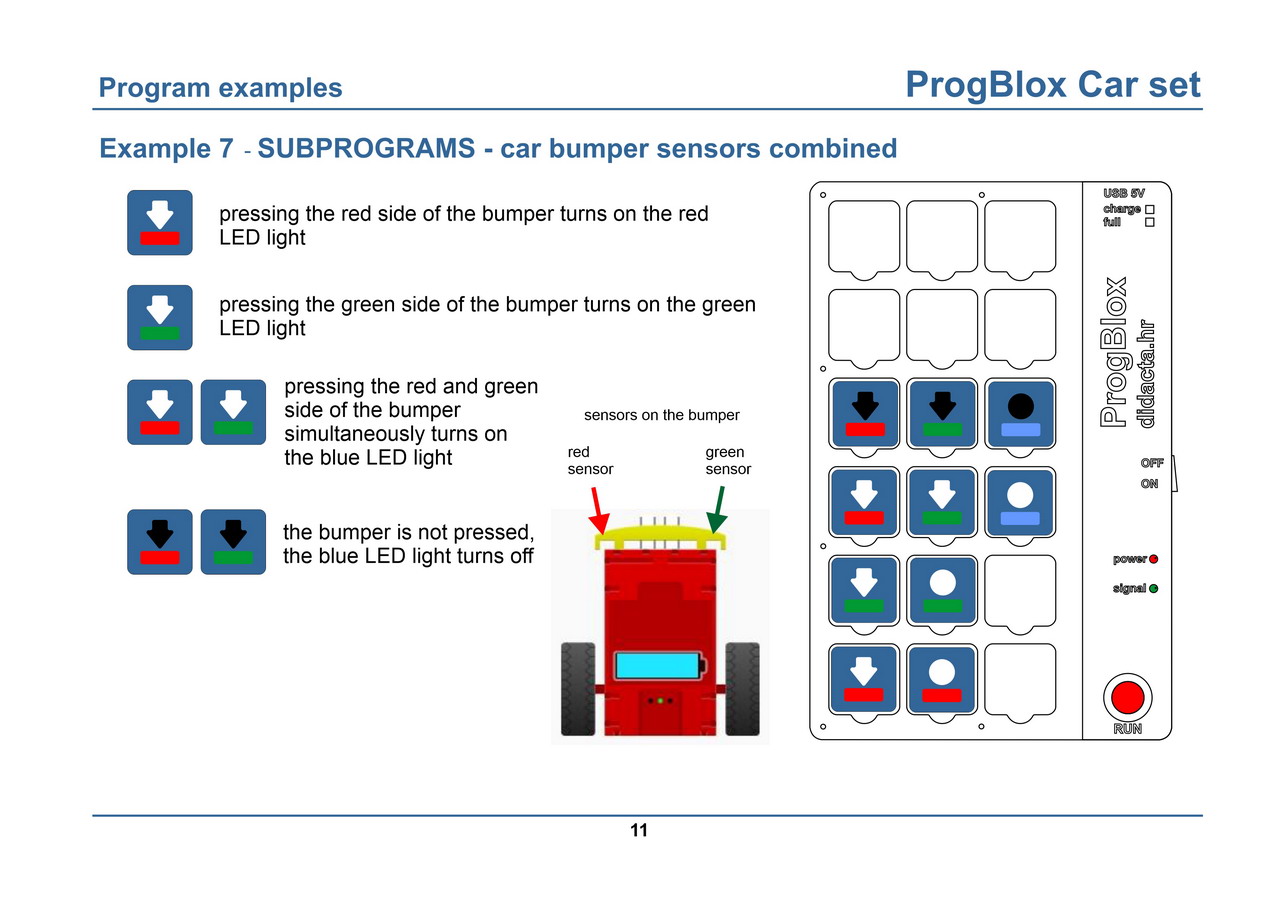
Example 07 - bumper sensors - combinations
Sensor control on the bumper. We marked the sensors on the bumper as RED and GREEN. The example shows the possible combinations of control of the bumper sensors, when they are pressed simultaneously or each separately.
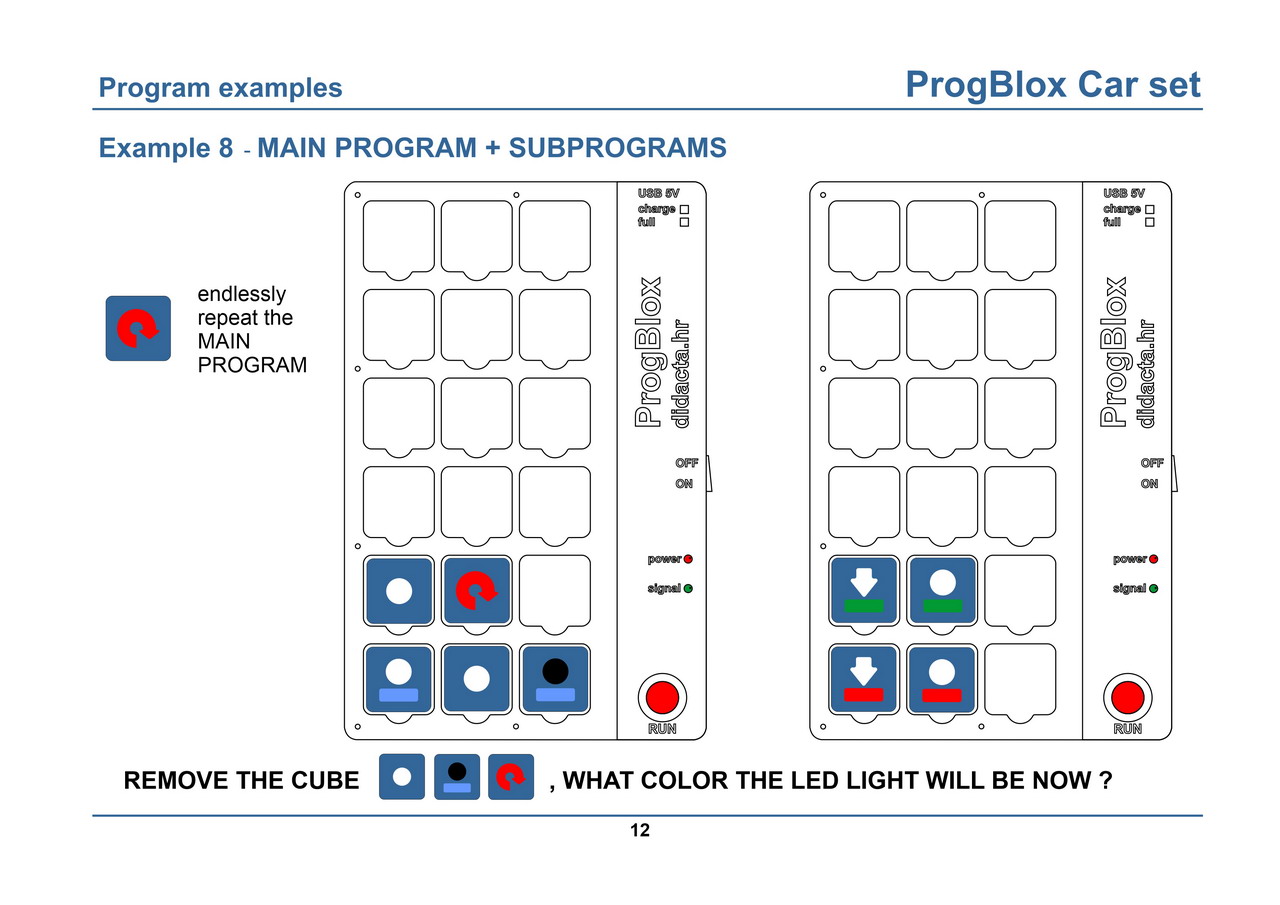
Example 08 - main program and subprograms
The example shows the combination of the main program working in an infinite loop (the blue LED light turns on and off) and the control of the sensor on the bumper. Pressing the red side of the bumper turns on the red LED light, and pressing the green side of the bumper turns on the green LED light.
Example 09 - LED lights
An example of turning on different LED lights with different durations by pressing the RUN button.
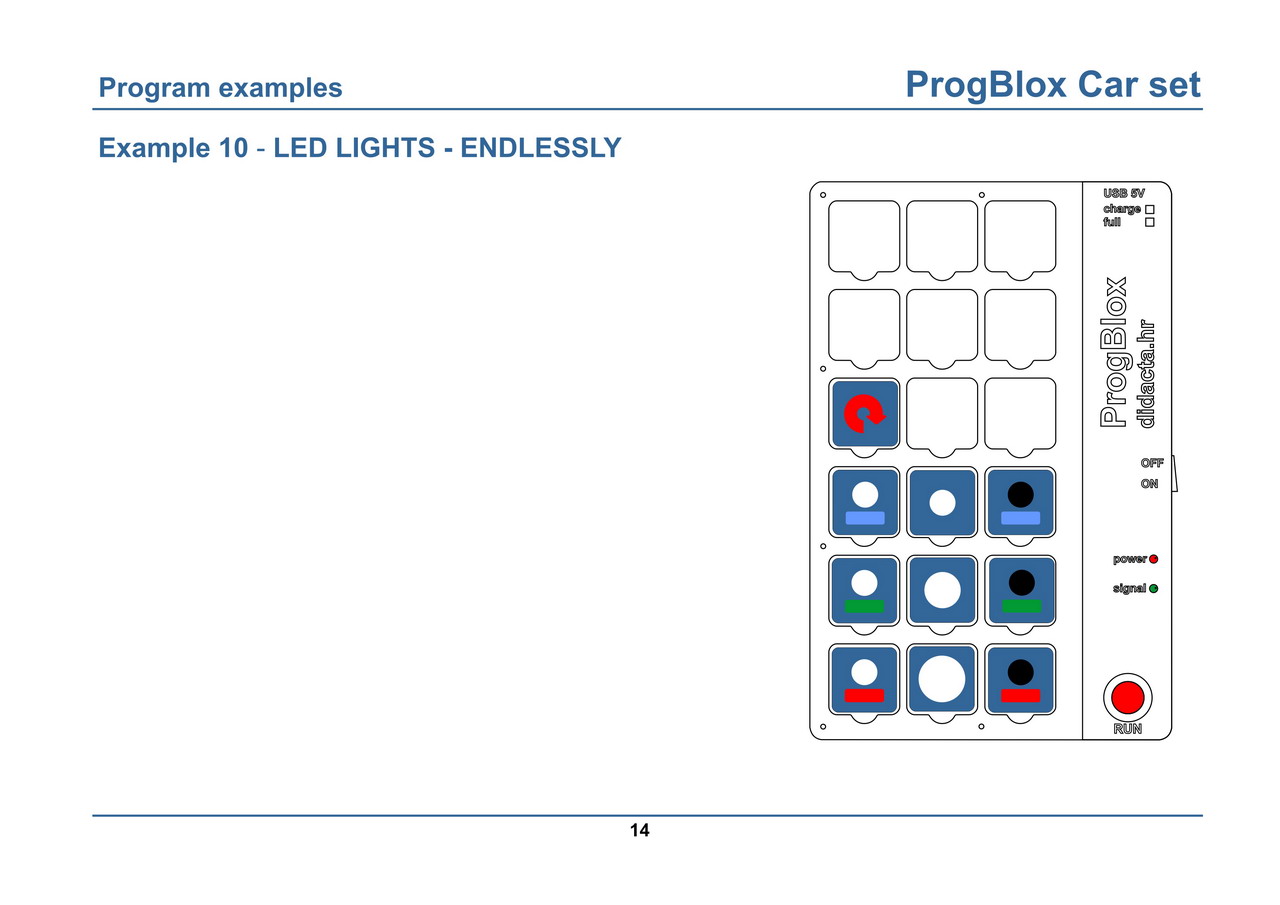
Example 10 - LED lights - endless loop
An example of turning on different LED lights with different time durations that repeats itself endlessly.
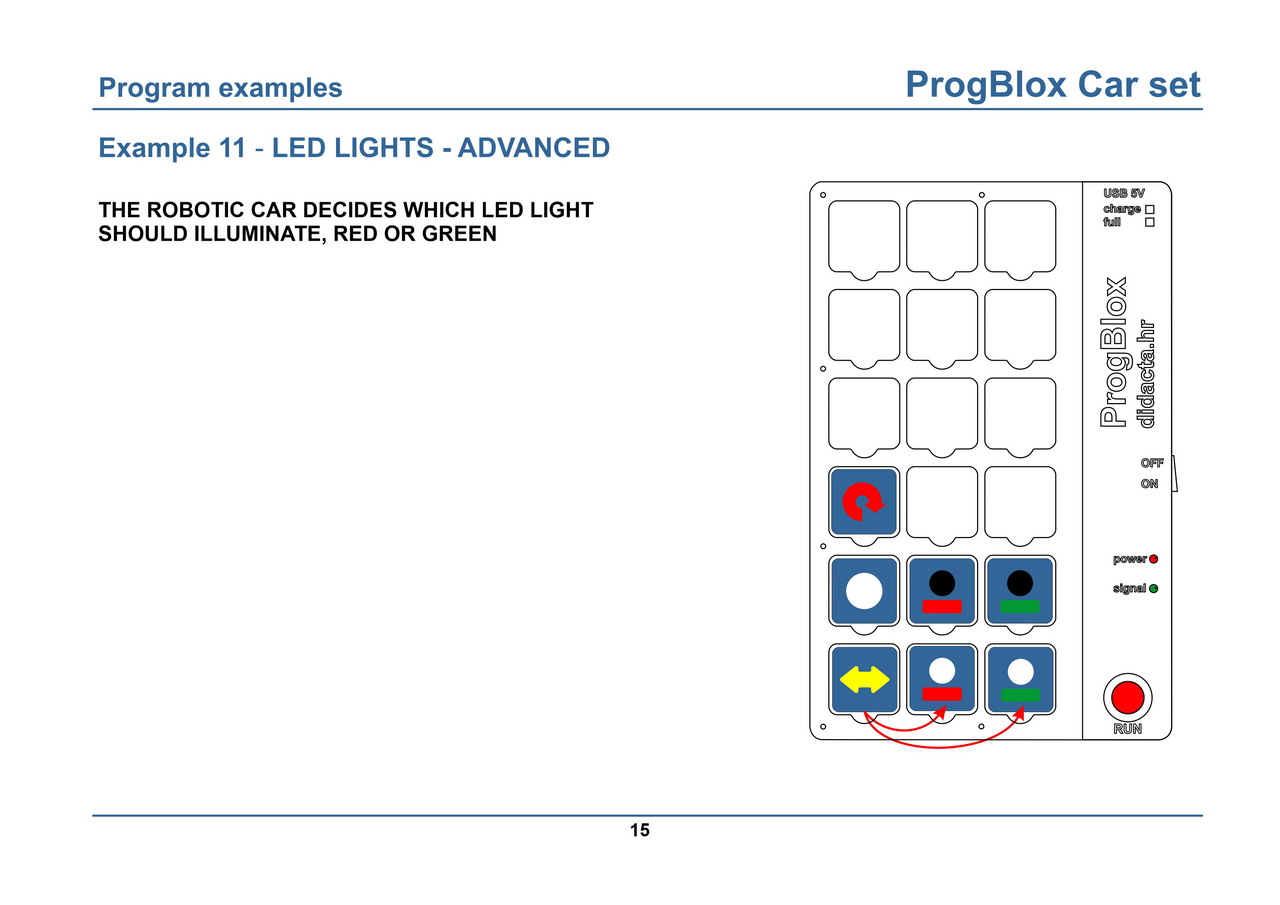
Example 11- LED lights - ADVANCED
An example of turning on different LED lights according to the selection of the robotic vehicle using the "DECISION" command cube (random). The choice can only be between two command cubes that, in order, are located after the decision command cube.
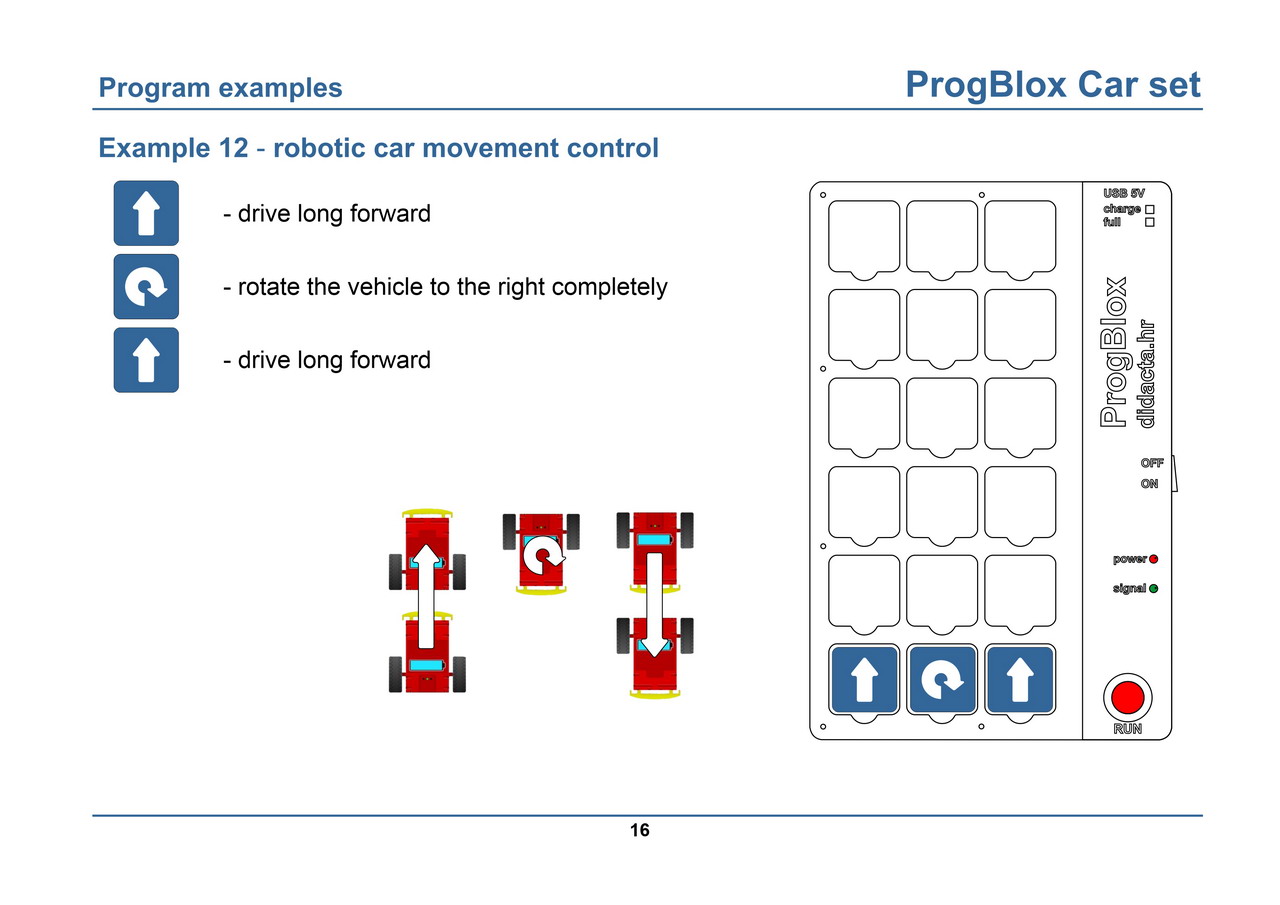
Example 12 - control of the robotic car 1
The example shows several commands to control the movement of the robotic car. The precision of performing certain actions (turns) can be different because it depends on the state of charge of the batteries.
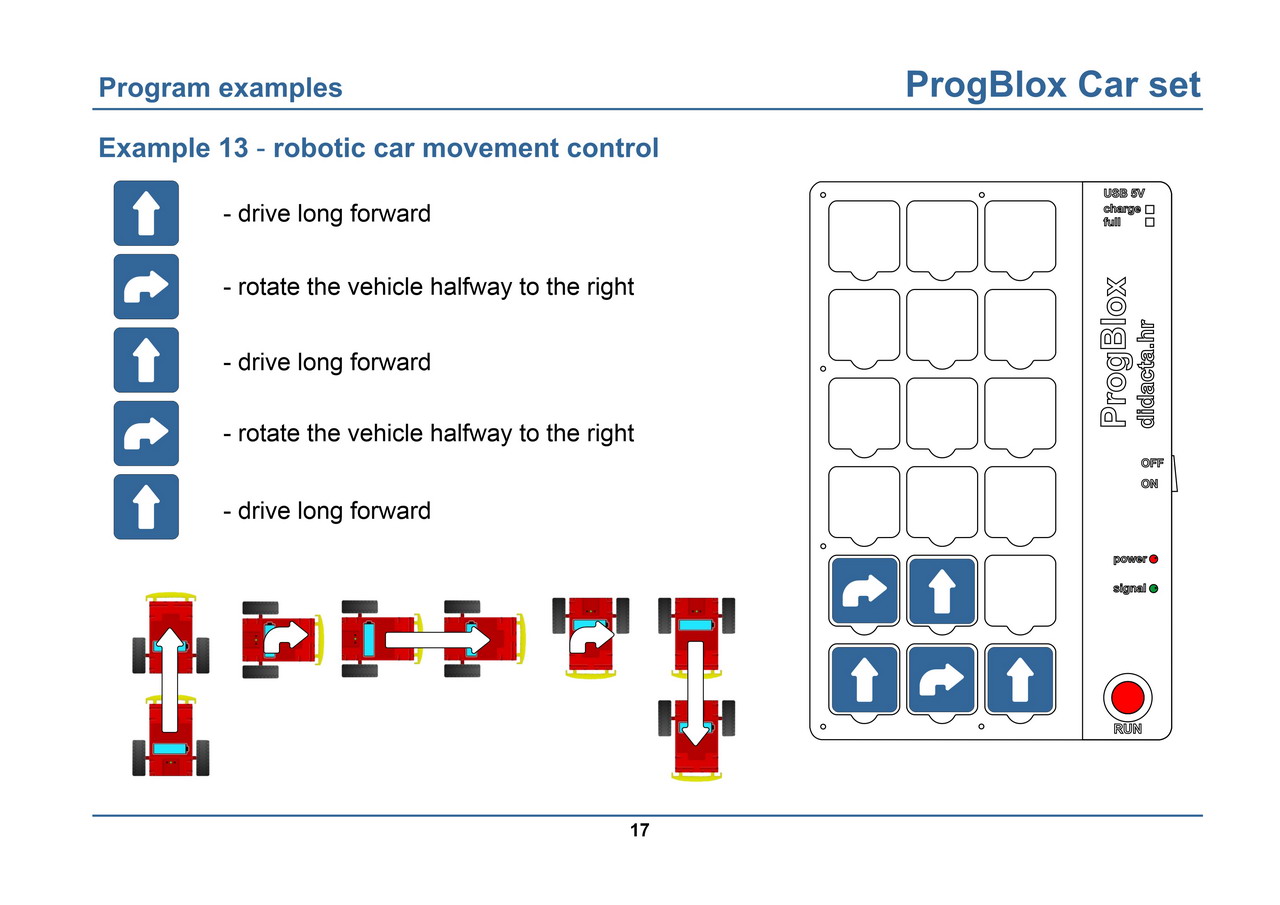
Example 13 - control of the robotic car 2
The example shows several commands to control the movement of the robotic vehicle. The precision of performing certain actions (turns) can be different because it depends on the state of charge of the batteries.
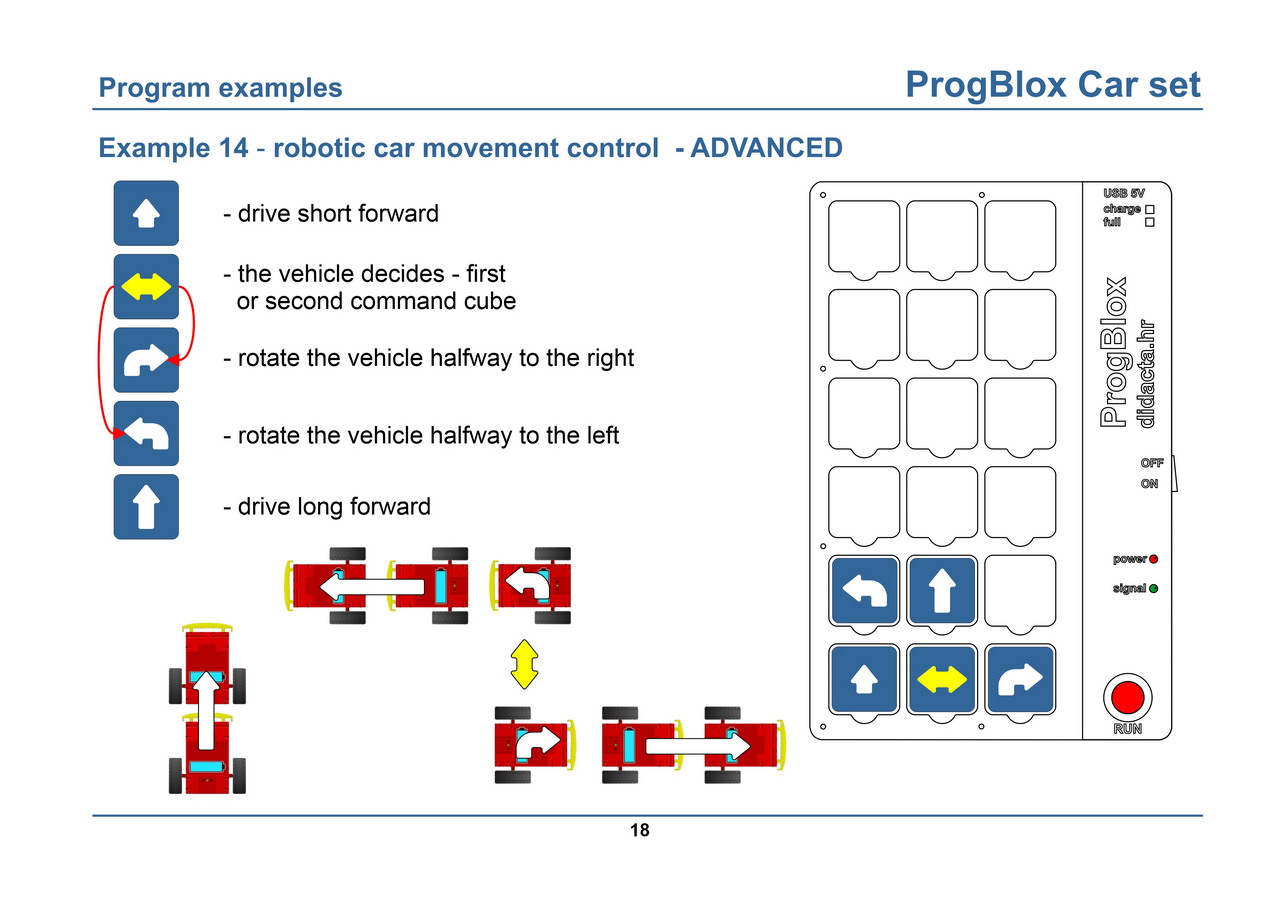
Example 14 - control of the robotic car 2 - ADVANCED
The example shows several commands to control the movement of the robotic vehicle. This example shows how to use the "DECISION" command cube to control a robotic cart. The robotic vehicle decides which way to go. The precision of performing certain actions (turns) can be different because it depends on the state of charge of the batteries.
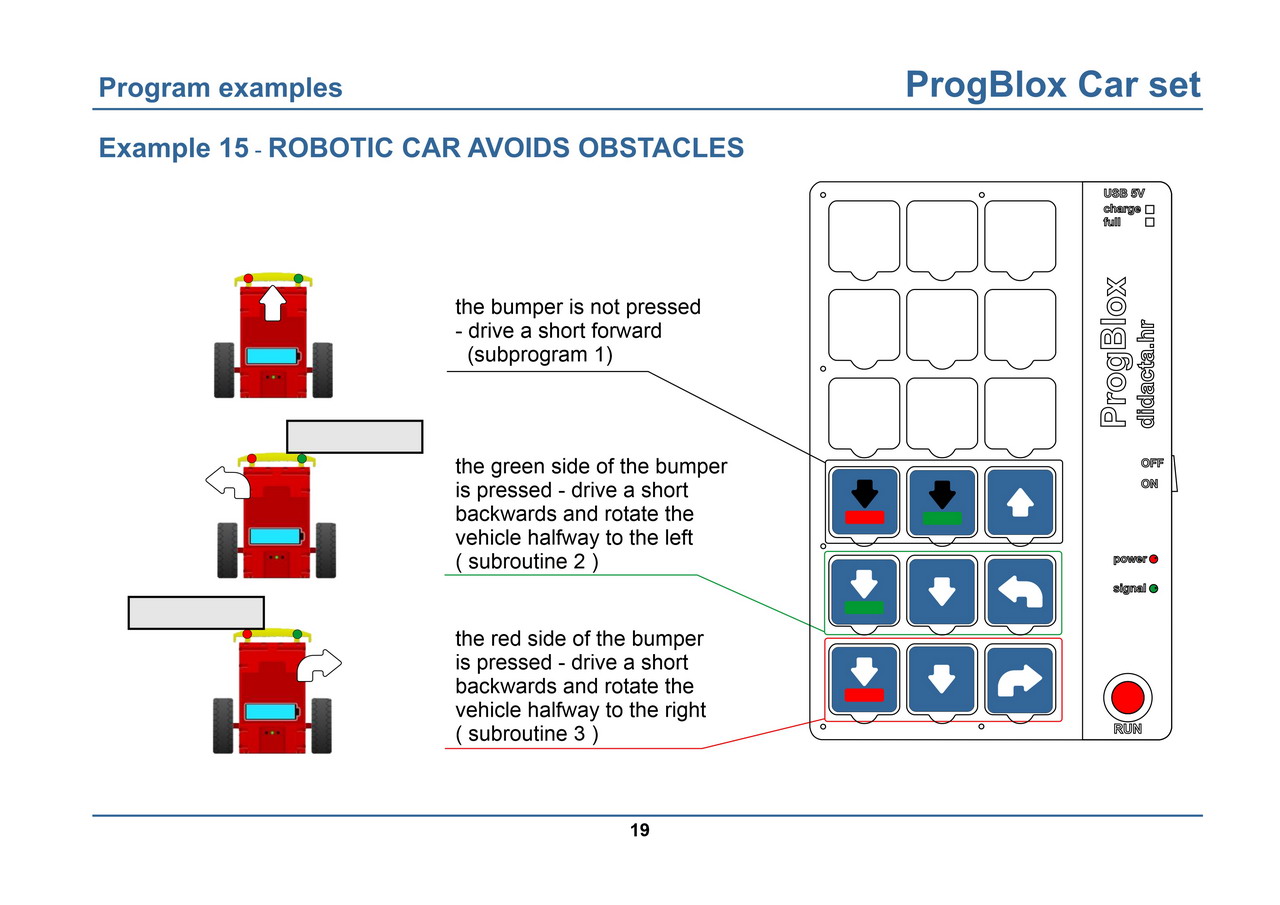
Example 15 - the robotic vehicle goes around obstacles
Every time the robot car touches an obstacle with the red or green side of the bumper, the robot car goes backwards and turns to the side depending on the side that was pressed. When the bumper is not pressed, the robotic car moves forward.
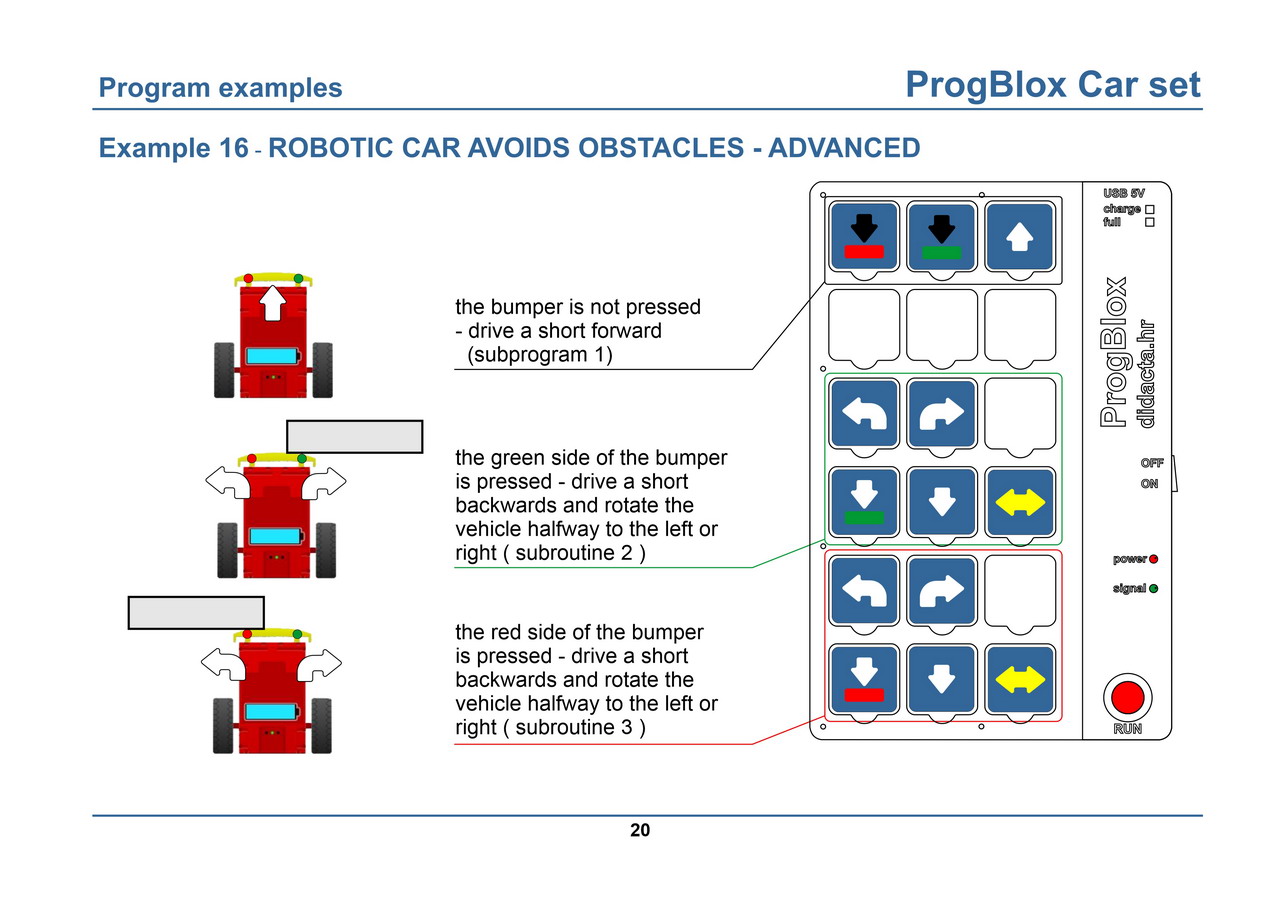
Example 16 - the robotic vehicle goes around obstacles - ADVANCED
Every time the robot car touches an obstacle with the red or green side of the bumper, the robot car goes backwards and turns to the side depending on the side that was pressed. By adding "DECISION" command cube, the robotic car will decide which side to turn. When the bumper is not pressed, the robotic vehicle moves forward.
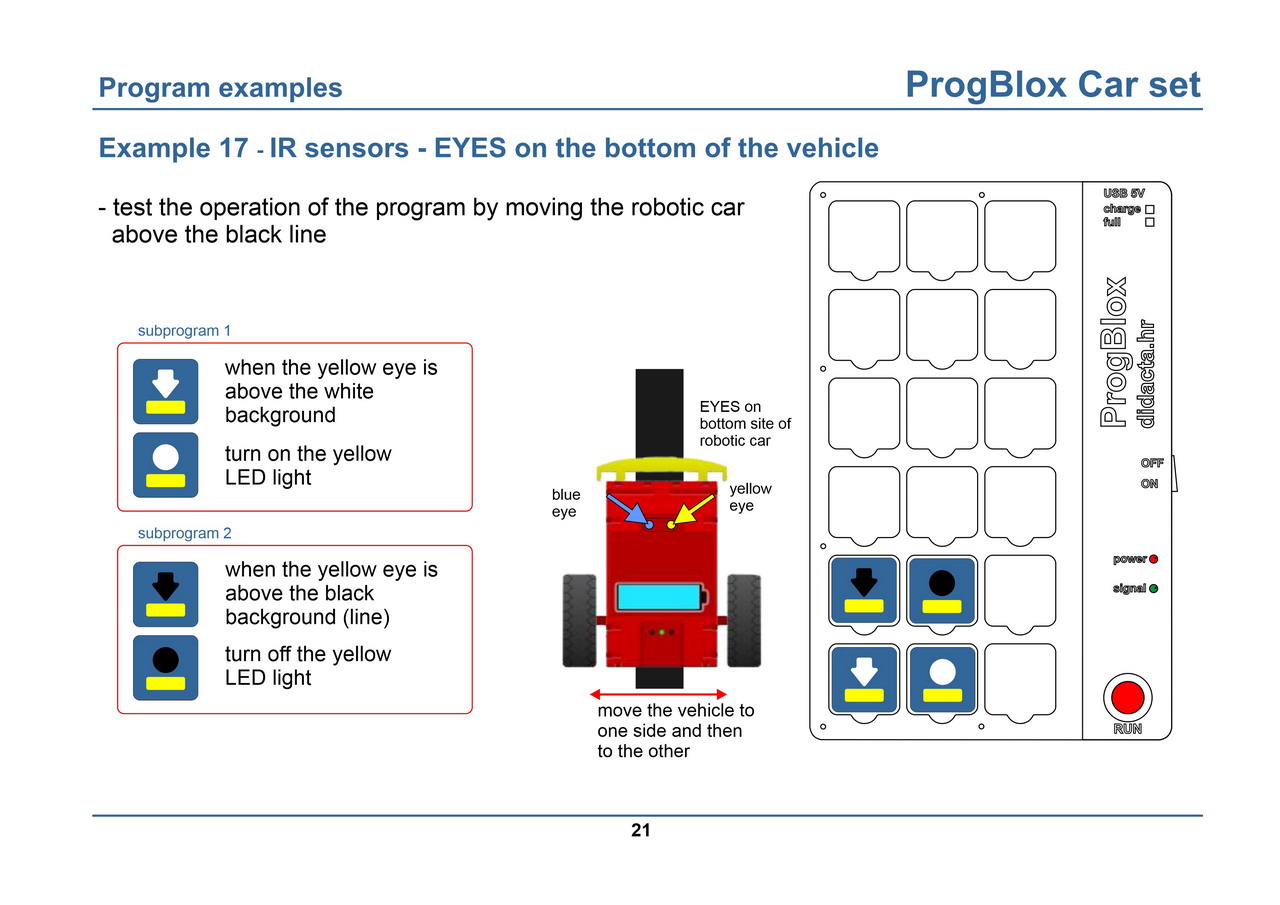
Example 17 - EYES of the robotic car - yellow eye
The robotic vehicle has two IR sensors, on the lower side, which we call EYES. He has a BLUE and a YELLOW eye. These eyes recognize whether the surface under the robotic car is dark or light. This example shows a simple YELLOW eye control. When the yellow eye is above a white (light) surface, the yellow LED light will turn on, and when it is above a black (dark) surface, the light will turn off.
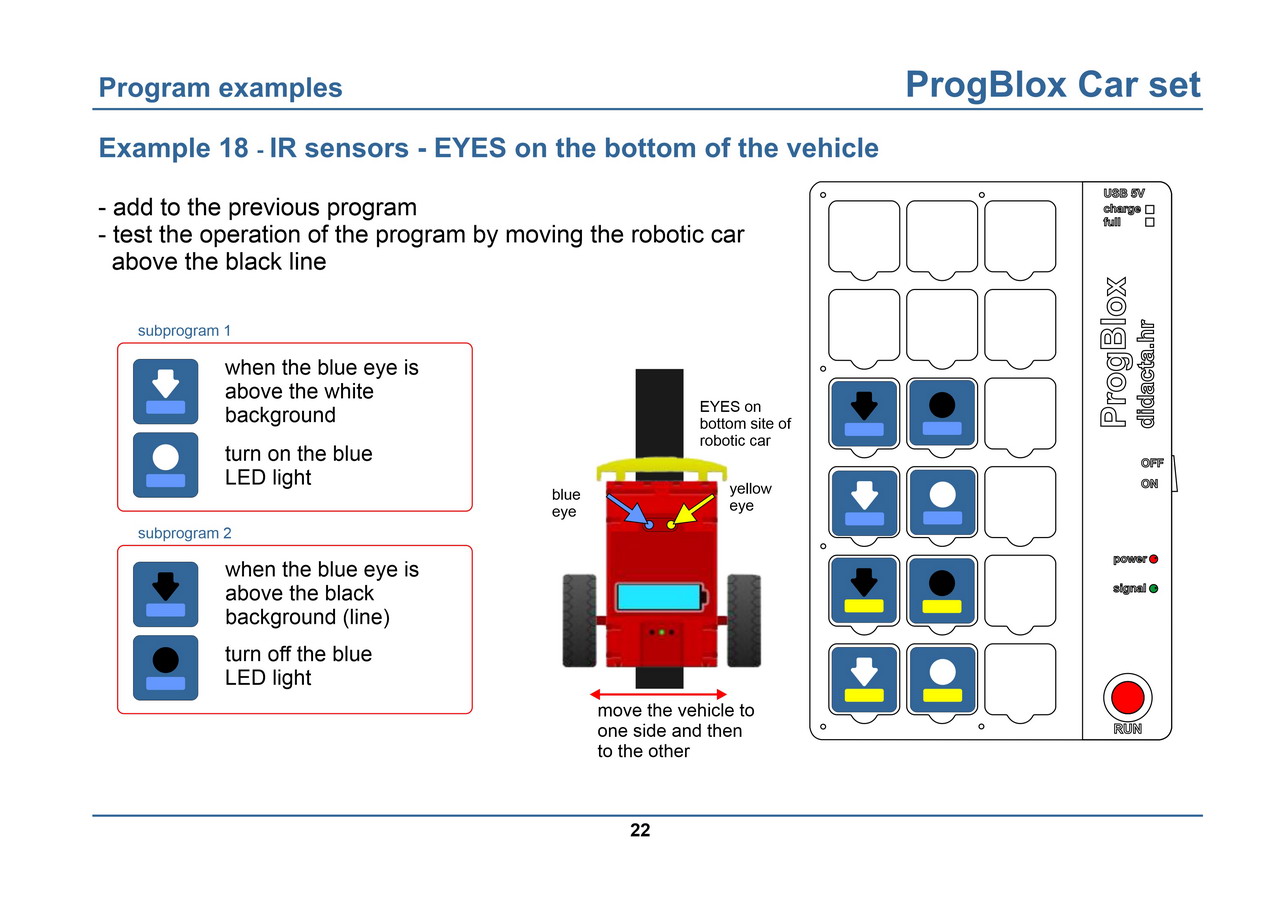
Example 18 - EYES of the robotic car
The robotic car has two IR sensors, on the lower side, which we call EYES. He has a BLUE and a YELLOW eye. These eyes recognize whether the surface under the robotic car is dark or light. This example shows a simple YELLOW eye and BLUE eye control. When the yellow eye is above a white (light) surface, the yellow LED light will turn on, and when it is above a black (dark) surface, the yellow light will turn off. When the blue eye is above a white (light) surface, the blue LED light will turn on, and when it is above a black (dark) surface, the blue light will turn off.
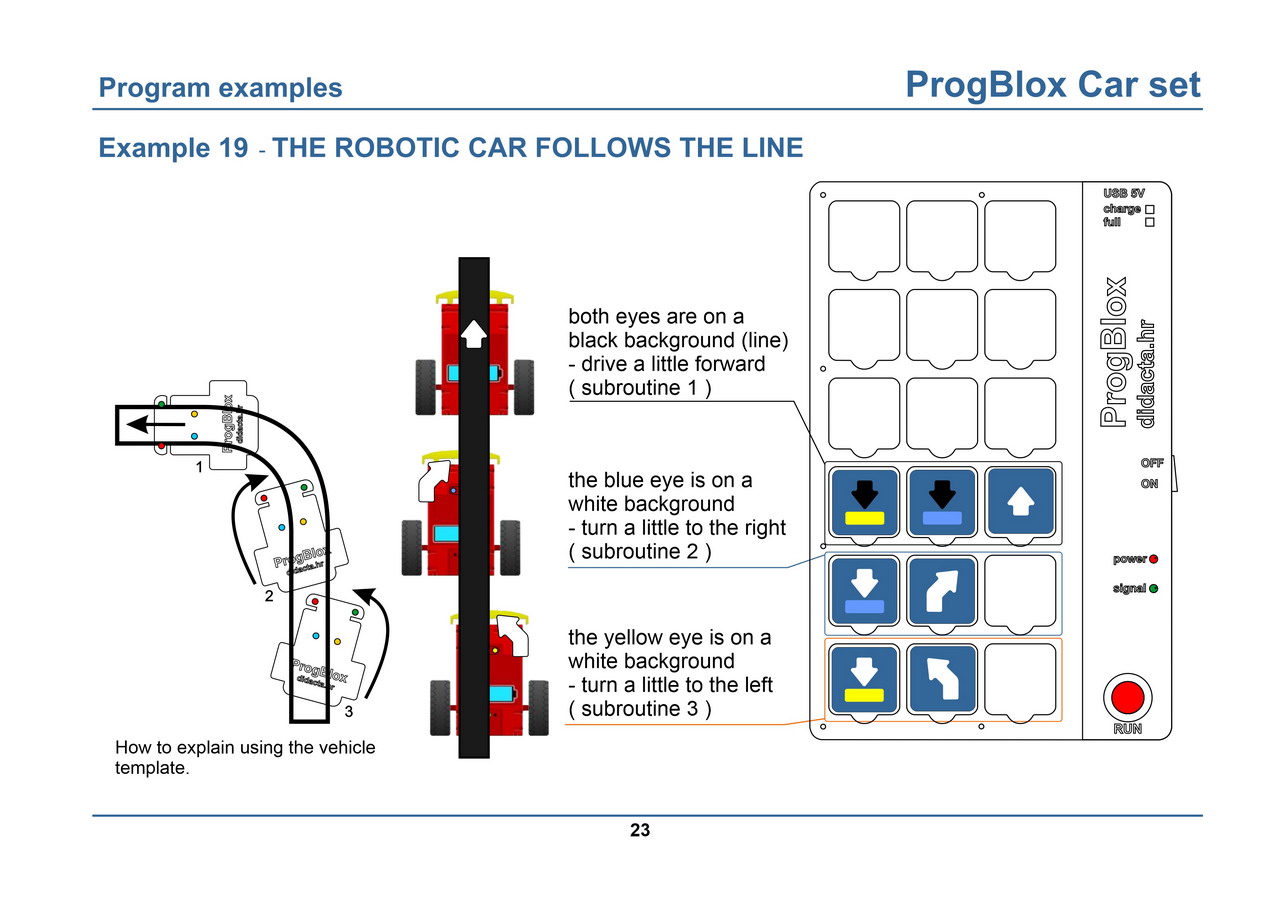
Example 19 - EYES - the robotic vehicle follows the line
Through the EYES, we control the position of the robotic car above the black line. In order for the robotic car to move along the line, it must constantly correct its position, except when it is above the line with both eyes. When both eyes are above the line, the robotic car moves forward. When the yellow eye is above the white surface, the robotic car should slightly turn to the opposite side (left) and return the robotic car to the line. The position of the robotic car is also corrected when the blue eye is above the white surface, you need to move slightly in the opposite direction (right) and return the robotic car to the line.
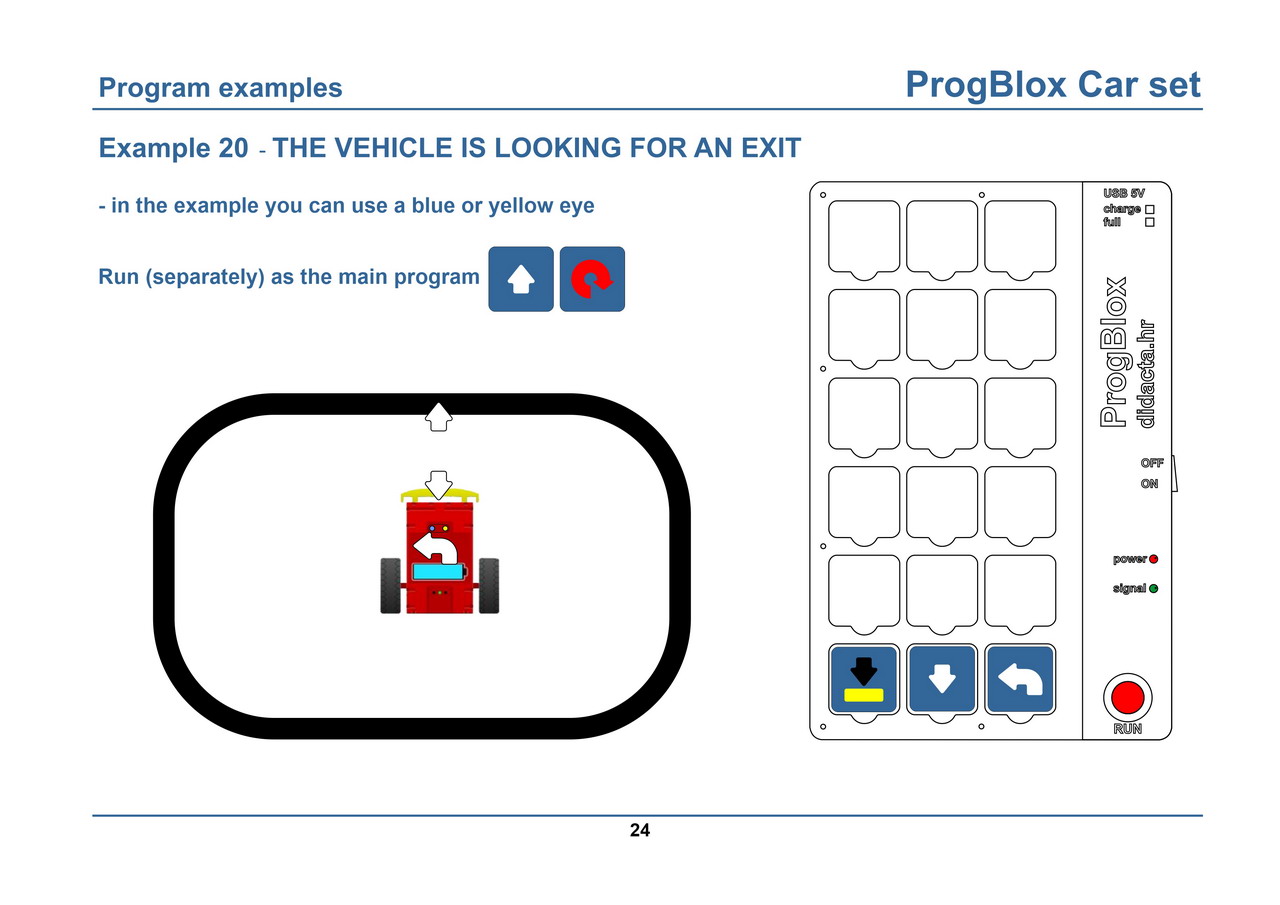
Example 20 - EYES - robotic vehicle in the polygon
With the help of one eye (yellow or blue), we can close the robotic cart inside the polygon. Through the main program, the vehicle moves forward endlessly. Every time the yellow eye finds a black (dark) surface, the robot vehicle goes back and turns to the left.
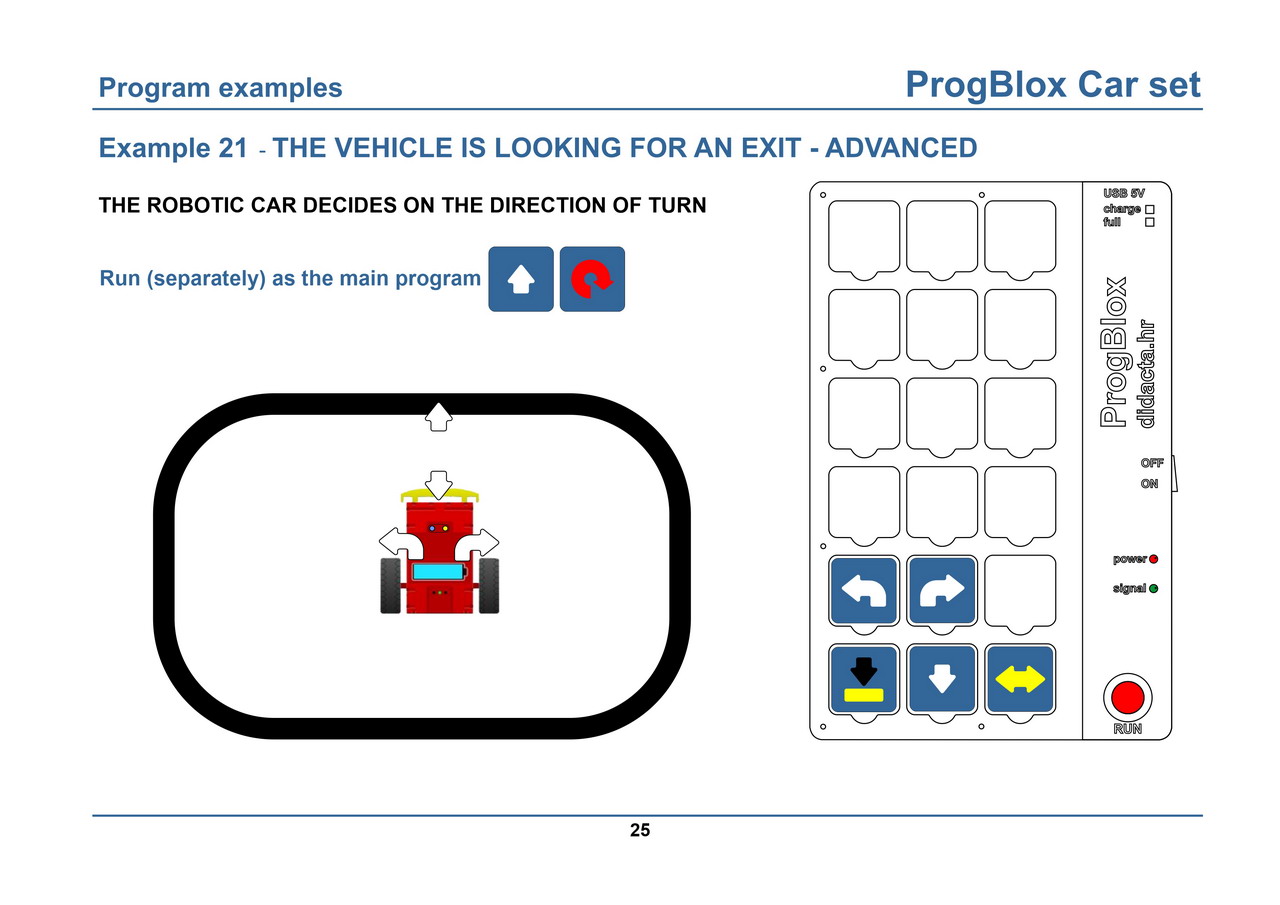
Example 21 - EYES - robotic vehicle in the polygon - ADVANCED
With the help of one eye (yellow or blue), we can close the robotic car inside the polygon. Through the main program, the robotic car moves forward endlessly. Every time the yellow eye finds a black (dark) surface, the robotic car goes back and turns to the side it chooses via the "DECISION" command cube.